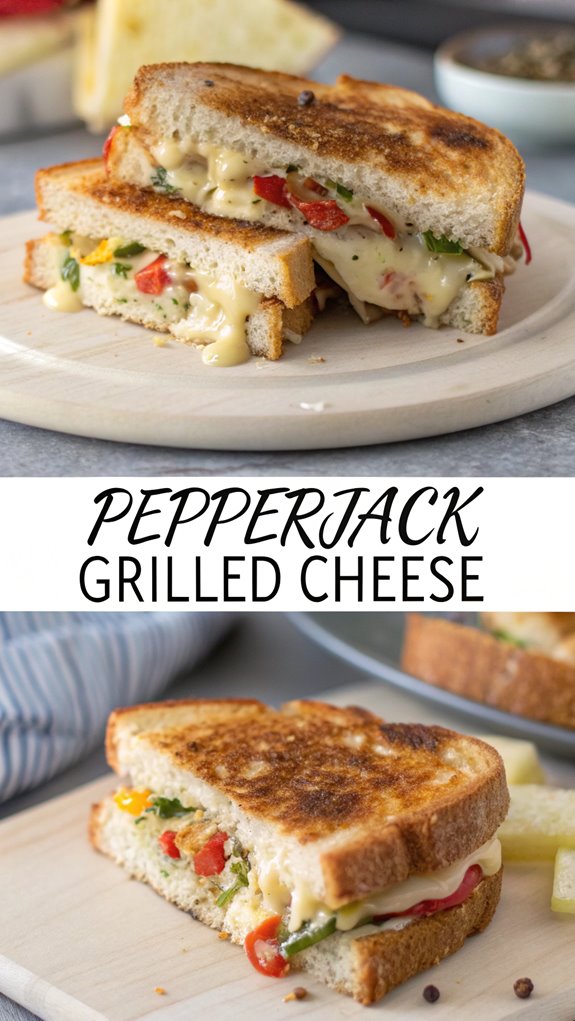
Pepperjack Grilled Cheese
When you think of grilled cheese, you likely envision the classic sandwich with its gooey texture and familiar taste. But have you considered how pepperjack cheese can elevate this comfort food into something extraordinary? With its spicy undertones and creamy melt, pepperjack brings a new dimension that’s hard to resist. By choosing the right bread and possibly adding a few unique ingredients, you can create a grilled cheese that’s not only satisfying but also intriguing. What’s more, the combination of flavors and textures invites endless experimentation, revealing a world of culinary possibilities just waiting to be explored.
Why You’ll Love This Recipe
If you’re a fan of bold flavors and comforting classics, you’ll absolutely love this pepperjack grilled cheese. This recipe takes the traditional grilled cheese and adds a spicy twist that elevates the dish. Using pepperjack cheese not only brings heat but also a creamy, melty texture that’s simply irresistible.
You’ll appreciate how easy it’s to make. With just a few ingredients—bread, pepperjack cheese, and butter—you can whip up a delicious sandwich in no time. Plus, you can easily customize it by adding extra ingredients like avocado, tomatoes, or even jalapeños for an extra kick.
The combination of toasty bread and gooey cheese creates a satisfying crunch with every bite. You can pair this sandwich with a warm bowl of tomato soup for a classic meal that’s sure to please your taste buds.
Whether you’re making it for lunch, a quick weeknight dinner, or a cozy weekend treat, this pepperjack grilled cheese fits perfectly into any occasion. It’s a simple yet flavorful recipe that showcases how a few ingredients can transform a classic dish into something exciting and new.
Enjoy making this delightful grilled cheese!
History
The history of grilled cheese sandwiches dates back to ancient times, with variations appearing in different cultures around the world. You might be surprised to learn that even the ancient Romans enjoyed a form of cheese toast. They’d mix bread and cheese, then toast it over an open flame, creating a simple yet delicious meal.
Fast forward to the Middle Ages, when cooks in Europe began to experiment with combining bread and cheese. This combination became popular, especially in France, where they made open-faced cheese sandwiches.
By the 1920s, the grilled cheese sandwich as you know it today began to take shape in America. It became a staple during the Great Depression, as it was an affordable and satisfying meal.
Throughout the years, grilled cheese sandwiches evolved, with people adding different types of cheese and toppings. In the 1960s, sliced bread became widely available, making the preparation even easier.
Today, you can find gourmet versions with unique cheeses, like pepper jack, and a variety of ingredients. This evolution shows how a simple sandwich can reflect cultural preferences and culinary creativity, making grilled cheese a beloved dish worldwide.
Recipe
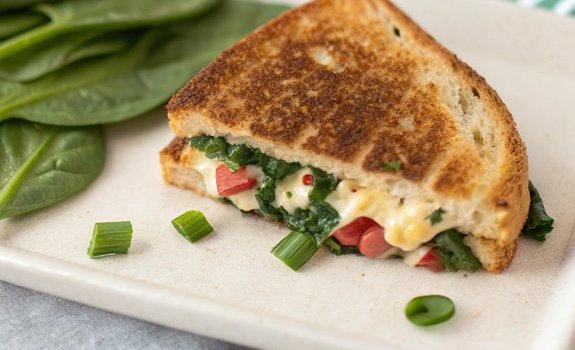
Pepperjack grilled cheese is a delicious twist on the classic comfort food that brings a spicy kick to your palate. This recipe combines the creamy, melty goodness of cheese with the distinctive heat of pepperjack, making it a perfect option for those who enjoy a little extra flavor in their meals.
Whether you’re preparing a quick lunch, a late-night snack, or a cozy dinner, this grilled cheese sandwich is sure to satisfy your cravings.
Creating the perfect pepperjack grilled cheese is easy and requires only a few simple ingredients. The key lies in the balance of flavors and the crispiness of the bread. Choose a high-quality bread that will hold up well to grilling, and don’t skimp on the butter; it’s essential for achieving that golden, crunchy exterior.
With these straightforward steps, you’ll be able to whip up a scrumptious sandwich that will impress your family and friends.
Ingredients:
– 2 slices of bread (your choice)
– 2 slices pepperjack cheese
– 1 tablespoon butter
– 1 tablespoon mayonnaise (optional)
– Fresh jalapeños or pickled jalapeños (optional, for extra heat)
Cooking Instructions:
1. Start by heating a non-stick skillet over medium heat. If you prefer a slightly crispy texture, you can add a few drops of olive oil to the pan.
2. While the skillet is heating, spread butter on one side of each slice of bread. If you’re using mayonnaise, spread it on the other side of each slice.
3. Place one slice of bread in the skillet, buttered side down. Add the pepperjack cheese on top, followed by any optional jalapeños if you desire extra heat.
4. Top with the second slice of bread, buttered side up, and cook for about 3-4 minutes until the bottom is golden brown and the cheese starts to melt.
5. Carefully flip the sandwich using a spatula, and cook the other side for an additional 3-4 minutes until it’s also golden brown and the cheese is fully melted.
6. Once cooked, remove the sandwich from the skillet and let it cool for a minute. Slice it in half and serve warm.
For the best results, use a mix of cheeses for added flavor and texture. You can also experiment with different types of bread, such as sourdough or whole grain, for a unique taste.
If you like a bit more heat, consider adding a dash of hot sauce to the cheese before grilling. Additionally, keep an eye on the heat; cooking on too high of a setting can burn the bread before the cheese melts.
Enjoy your pepperjack grilled cheese!
Final Thoughts
There’s nothing quite like savoring a warm, cheesy pepperjack grilled cheese sandwich after a long day. This delicious treat not only satisfies your hunger but also brings a burst of flavor that elevates the classic grilled cheese experience.
When you make this sandwich, you’re not just putting together bread and cheese; you’re creating a comforting meal that combines creamy, spicy pepperjack with crispy, golden bread.
As you enjoy your sandwich, consider the versatility it offers. You can easily customize it by adding ingredients like tomatoes, avocado, or even bacon for extra flavor.
Don’t hesitate to experiment with different types of bread, too. Sourdough, whole grain, or even a hearty ciabatta can make a delightful difference.
Remember that cooking is all about finding what works best for you. If you prefer a milder taste, feel free to mix in some mozzarella or cheddar with the pepperjack.
The key is to have fun in the kitchen, so don’t stress about perfection.
In the end, your pepperjack grilled cheese is a canvas for creativity. Enjoy every bite and let it brighten your day!
FAQ
Got questions about making the perfect pepperjack grilled cheese? You’re not alone! Here are some common queries to help you master this delicious sandwich.
What kind of bread should I use? For the best results, choose a sturdy bread like sourdough or whole grain. These types hold up well against the melted cheese.
How do I get that perfect golden crust? Use medium heat to allow the bread to toast evenly without burning. Butter both sides of the bread for a rich flavor and crispy texture.
Can I add other ingredients? Absolutely! Feel free to experiment with extras like sliced tomatoes, avocados, or even turkey.
Just be mindful of the balance, so your sandwich doesn’t get too soggy.
What if I don’t have pepperjack cheese? You can substitute with other cheeses like Monterey Jack or even cheddar, but the flavor will change.
How do I store leftovers? If you have any, wrap them tightly and store in the fridge.
Reheat in a skillet for the best results. Enjoy your cooking, and soon you’ll be a pepperjack grilled cheese pro!
Pepperjack Grilled Cheese
- Ingredients:
- - 2 slices of bread your choice
- - 2 slices pepperjack cheese
- - 1 tablespoon butter
- - 1 tablespoon mayonnaise optional
- - Fresh jalapeños or pickled jalapeños optional, for extra heat
Cooking Instructions:
Start by heating a non-stick skillet over medium heat. If you prefer a slightly crispy texture, you can add a few drops of olive oil to the pan.
While the skillet is heating, spread butter on one side of each slice of bread. If you're using mayonnaise, spread it on the other side of each slice.
Place one slice of bread in the skillet, buttered side down. Add the pepperjack cheese on top, followed by any optional jalapeños if you desire extra heat.
Top with the second slice of bread, buttered side up, and cook for about 3-4 minutes until the bottom is golden brown and the cheese starts to melt.
Carefully flip the sandwich using a spatula, and cook the other side for an additional 3-4 minutes until it's also golden brown and the cheese is fully melted.
Once cooked, remove the sandwich from the skillet and let it cool for a minute. Slice it in half and serve warm.
For the best results, use a mix of cheeses for added flavor and texture. You can also experiment with different types of bread, such as sourdough or whole grain, for a unique taste.
If you like a bit more heat, consider adding a dash of hot sauce to the cheese before grilling. Additionally, keep an eye on the heat; cooking on too high of a setting can burn the bread before the cheese melts.
Enjoy your pepperjack grilled cheese!