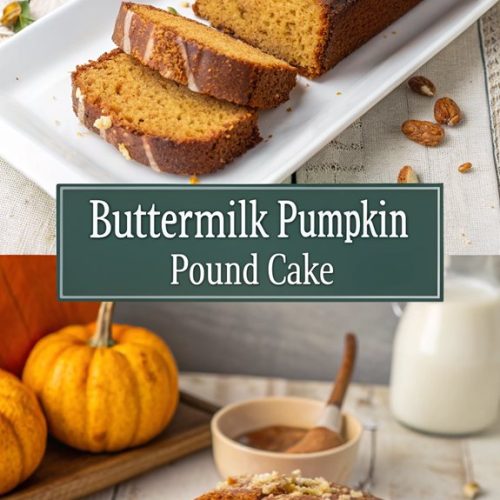
Buttermilk Pumpkin Pound Cake
When you think of autumn, you think of cozy flavors, warm spices, and inviting desserts. Buttermilk Pumpkin Pound Cake fits all those criteria and more. This cake combines the richness of pumpkin with a moist, buttery texture, making it a perfect treat for any gathering. With simple ingredients and easy steps, you’ll find yourself making this cake often. Discover how to create this seasonal favorite and impress your family and friends with your baking skills.
Why You’ll Love This Recipe
If you’re looking for a dessert that’s both delicious and easy to make, you’ll love this Buttermilk Pumpkin Pound Cake. This cake is rich and buttery, making it a perfect treat for any season. With simple steps, even novice bakers can achieve great results. The pumpkin gives it a delightful autumn flavor that’s ideal for fall gatherings. Plus, you can prepare it in advance and freeze it, ensuring you always have a dessert ready. Original pound cakes were large and heavy, but modern variations like this one offer a lighter and equally delicious experience. Nutritionally, the pumpkin adds fiber and vitamins, making it a bit healthier. You can also customize it by reducing the butter and sugar or trying different glazes.
History
While many enjoy the rich flavors of buttermilk pumpkin pound cake today, its roots trace back to the classic pound cake, which has an interesting history.
The name “pound cake” comes from the original recipe that called for a pound each of butter, flour, sugar, and eggs. These traditional cakes were heavy and dense, quite different from lighter modern versions.
Over the years, bakers started experimenting with various flavors, incorporating ingredients like coconut, chocolate, and, eventually, pumpkin. Today’s buttermilk pumpkin pound cake combines seasonal flavors with the classic pound cake formula, showcasing moist, tender pumpkin cake as a highlight of autumn baking. This evolution showcases how baking adapts over time, allowing you to enjoy a delightful blend of history and taste in every slice.
Recipe
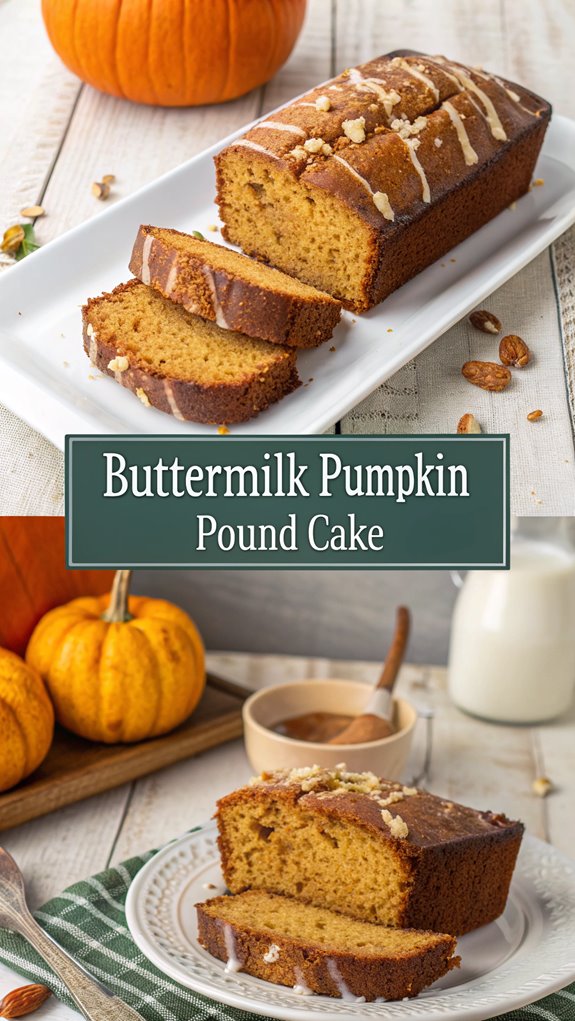
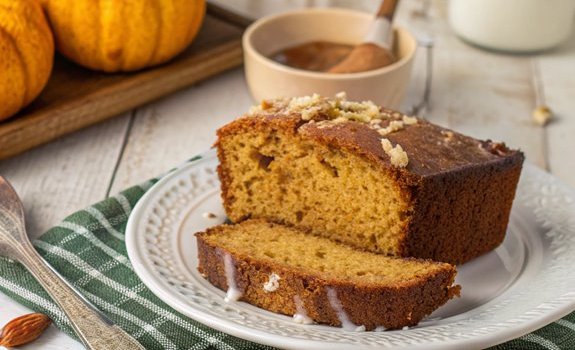
Buttermilk Pumpkin Pound Cake is a delightful treat that perfectly combines the warm flavors of pumpkin and spices with a moist, tender cake. Ideal for autumn gatherings or cozy family dinners, this cake isn’t only delicious but also easy to prepare.
The addition of buttermilk adds a subtle tanginess that enhances the richness of the pumpkin, while the spices infuse the cake with comforting aromas that will fill your kitchen.
This recipe features a buttery texture, making it an excellent base for various glazes and icings. Whether you prefer a sweet buttermilk glaze or a rich caramel icing, this pumpkin pound cake is versatile and sure to impress your guests.
The optional topping of rosemary-roasted honey walnuts adds a delightful crunch and flavor contrast, making each slice truly unforgettable.
Ingredients
- 3 cups all-purpose flour
- 2 teaspoons baking powder
- ¾ cup buttermilk
- 1 (15-oz) can pumpkin puree
- 2 ½ cups packed dark brown sugar
- 2 teaspoons ground cinnamon
- 2 teaspoons ground ginger
- ½ teaspoon freshly grated nutmeg
- 1 teaspoon salt
- 1 ½ teaspoons vanilla extract
- Buttermilk glaze:
- ⅓ cup buttermilk
- ¼ cup sugar
- 2 tablespoons butter
- ½ teaspoon pumpkin spice
- ½ teaspoon vanilla
- 2 teaspoons cornstarch
- ⅛ teaspoon baking soda
- Caramel icing:
- 1 cup brown sugar
- ½ cup butter
- 5 tablespoons milk
- 1 cup powdered sugar
- 1 teaspoon vanilla
- A pinch of salt
- Optional: Rosemary-roasted honey walnuts for topping
Instructions
- Preheat your oven to 350°F. Generously spray a 10- to 12-cup tube pan with baking spray and then rub it with a paper towel. You can also grease and flour a 10-inch tube or bundt pan to guarantee easy cake release.
- Spread the pumpkin puree over paper towels to drain any excess moisture. This step helps to prevent the cake from becoming too dense.
- In a large mixing bowl, combine the all-purpose flour, baking powder, ground ginger, ground cinnamon, salt, freshly grated nutmeg, and any additional spices if using. Mix well and set aside.
- In a stand mixer, beat together the softened butter, dark brown sugar, eggs, pumpkin puree, and vanilla extract until well combined and fluffy.
- Gradually add the dry ingredient mixture to the wet ingredients, alternating with the buttermilk, and mix until just combined. Be careful not to overmix.
- Pour the batter into the prepared tube or bundt pan and smooth the top. Bake in the preheated oven for about 60-70 minutes, or until a toothpick inserted into the center comes out clean.
- While the cake is baking, prepare your desired glaze or icing. For the buttermilk glaze, combine all the glaze ingredients in a small saucepan over medium heat, whisking until smooth. For the caramel icing, melt the butter and brown sugar together, then add the milk, powdered sugar, vanilla, and salt until smooth.
- Once the cake is done baking, allow it to cool in the pan for about 10-15 minutes before transferring it to a wire rack. Once completely cooled, drizzle the buttermilk glaze over the cake or spread the caramel icing on top. Optionally, sprinkle with rosemary-roasted honey walnuts for added texture and flavor.
Extra Tips
When preparing this cake, it’s crucial to verify that your ingredients are at room temperature, especially the butter and eggs. This will help create a smoother batter and a more uniform texture in the finished cake.
If you prefer a stronger spice flavor, feel free to adjust the quantities of cinnamon, ginger, and nutmeg to your taste. Additionally, if you find that the cake is browning too quickly while baking, you can loosely cover it with aluminum foil to prevent burning.
Enjoy your baking!
Final Thoughts
When you’re looking for a dessert that combines comfort and flavor, this Buttermilk Pumpkin Pound Cake stands out as a fantastic choice.
Its rich, buttery, and spiced flavor makes it perfect for fall gatherings like Thanksgiving or casual tailgate parties. This cake is not only loved by guests but also great for sharing at celebrations, making it a versatile addition to your dessert table.
You’ll appreciate how easy it’s to prepare, with straightforward instructions that anyone can follow. Plus, it looks great when baked in tube pans.
This cake keeps well at room temperature for a day, or you can freeze it for later enjoyment.
Feel free to customize it with nuts, dried fruits, or apples.
With its dense texture and moist crumb, this pound cake is sure to impress your guests and keep them coming back for more.
FAQ
Have you ever wondered about the best practices for making Buttermilk Pumpkin Pound Cake? First, use pureed pumpkin, not pumpkin pie filling, and drain it on paper towels before mixing it into the batter. You can use regular or low-fat buttermilk; if you need homemade buttermilk, just mix 1 cup of milk with 1 tablespoon of vinegar or lemon juice and let it sit for 5 minutes. For baking, preheat your oven to 350°F and bake for about 55 minutes, using a tube pan for the best results. Additionally, using a Nordic Bundt Pan can enhance the cake’s appearance with its decorative design. Cool the cake in the pan for 15 minutes before inverting it. If you want to make it ahead, store it in an airtight container and add the glaze just before serving.
Buttermilk Pumpkin Pound Cake
- Ingredients
- 3 cups all-purpose flour
- 2 teaspoons baking powder
- ¾ cup buttermilk
- 1 15-oz can pumpkin puree
- 2 ½ cups packed dark brown sugar
- 2 teaspoons ground cinnamon
- 2 teaspoons ground ginger
- ½ teaspoon freshly grated nutmeg
- 1 teaspoon salt
- 1 ½ teaspoons vanilla extract
- Buttermilk glaze:
- ⅓ cup buttermilk
- ¼ cup sugar
- 2 tablespoons butter
- ½ teaspoon pumpkin spice
- ½ teaspoon vanilla
- 2 teaspoons cornstarch
- ⅛ teaspoon baking soda
- Caramel icing:
- 1 cup brown sugar
- ½ cup butter
- 5 tablespoons milk
- 1 cup powdered sugar
- 1 teaspoon vanilla
- A pinch of salt
- Optional: Rosemary-roasted honey walnuts for topping
Instructions
Preheat your oven to 350°F. Generously spray a 10- to 12-cup tube pan with baking spray and then rub it with a paper towel. You can also grease and flour a 10-inch tube or bundt pan to guarantee easy cake release.
Spread the pumpkin puree over paper towels to drain any excess moisture. This step helps to prevent the cake from becoming too dense.
In a large mixing bowl, combine the all-purpose flour, baking powder, ground ginger, ground cinnamon, salt, freshly grated nutmeg, and any additional spices if using. Mix well and set aside.
In a stand mixer, beat together the softened butter, dark brown sugar, eggs, pumpkin puree, and vanilla extract until well combined and fluffy.
Gradually add the dry ingredient mixture to the wet ingredients, alternating with the buttermilk, and mix until just combined. Be careful not to overmix.
Pour the batter into the prepared tube or bundt pan and smooth the top. Bake in the preheated oven for about 60-70 minutes, or until a toothpick inserted into the center comes out clean.
While the cake is baking, prepare your desired glaze or icing. For the buttermilk glaze, combine all the glaze ingredients in a small saucepan over medium heat, whisking until smooth. For the caramel icing, melt the butter and brown sugar together, then add the milk, powdered sugar, vanilla, and salt until smooth.
Once the cake is done baking, allow it to cool in the pan for about 10-15 minutes before transferring it to a wire rack. Once completely cooled, drizzle the buttermilk glaze over the cake or spread the caramel icing on top. Optionally, sprinkle with rosemary-roasted honey walnuts for added texture and flavor.