bread
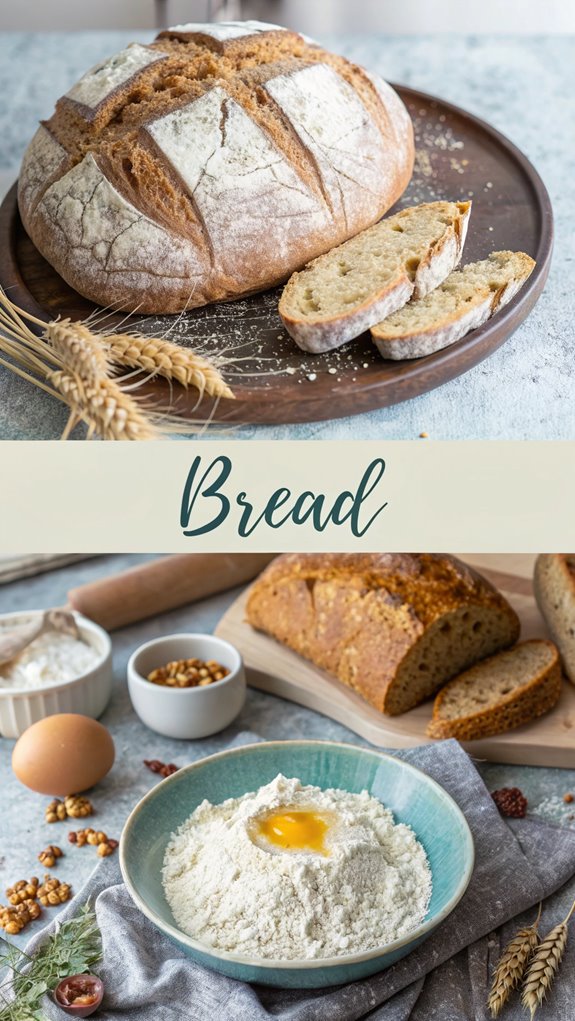
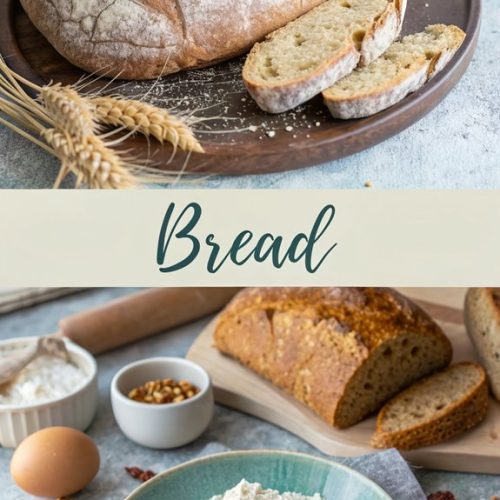
Bread
When you think about bread, consider its long history and the comfort it brings. You can create your own loaves at home, allowing you to control ingredients and flavors. The simple process involves just a few components, making it easy for anyone to try baking. As you explore the steps and techniques, you’ll discover not just the recipe itself, but also the joy of crafting something delicious from scratch. What else might surprise you about this everyday staple?
Why You’ll Love This Recipe
When you make homemade bread, you’ll discover a delightful experience that goes beyond just taste. The freshness of bread right out of the oven can’t be matched; you can enjoy it immediately. Additionally, the aroma of freshly baked bread enhances the home environment, making the experience even more enjoyable.
You’ll also love how easy it’s to customize your bread. Skip the strange chemicals found in store-bought options and add your favorite spices or ingredients instead. If you use a bread machine, the preparation becomes even simpler.
With so many varieties to choose from, you can create something new each time. Plus, homemade bread is often cheaper than artisanal options.
History
Bread has a long and fascinating history that dates back thousands of years, shaping cultures and diets around the world.
In ancient times, around 8000 BC, people crushed grains by hand to create unleavened bread. By 3000 BC, Egyptians developed leavened bread using tougher wheat varieties. This innovation paved the way for the first chain of bakeries established in 1783, which transformed the way bread was produced and sold.
During medieval times, bakers’ guilds formed to regulate bread prices, and different breads emerged for nobility and the poor.
The industrial age saw the first chain of bakeries in 1783 and innovations like rollermills in 1834, simplifying flour production.
In the twentieth century, bread slicing machines made pre-sliced bread popular, and calcium was added to flour to improve health.
This rich history shows how bread evolved and continues to impact our lives today.
Recipe
Ingredients:
– 2 ¼ teaspoons active dry yeast
– 1 ½ cups warm water (105-115°F)
– 1 tablespoon granulated sugar or honey
– 4-5 cups bread flour or all-purpose flour
– 2 teaspoons salt
– 2 tablespoons canola or vegetable oil
Instructions:
- Proof the Yeast: In a small bowl, combine the warm water, yeast, and sugar or honey. Stir gently and let it sit for about 5-10 minutes until it becomes foamy and bubbly. This indicates that the yeast is active and ready to use.
- Mix the Dough: In a large mixing bowl or stand mixer, combine 4 cups of flour and salt. Make a well in the center and pour in the yeast mixture and oil. Gradually add the remaining flour, mixing until the dough begins to pull away from the sides of the bowl.
- Knead the Dough: Turn the dough out onto a lightly floured surface. Knead the dough for about 4-5 minutes using a stand mixer on medium speed or by hand for 5-8 minutes until it’s smooth and slightly sticky. Kneading helps develop gluten, which is essential for the texture and shape of the bread.]
- First Rise: Place the kneaded dough in a greased bowl, cover it with a clean cloth or plastic wrap, and leave it in a warm place to rise until it has doubled in size, approximately 1-2 hours.
- Shape the Dough: Once the dough has risen, punch it down to release the air. Turn it out onto a floured surface and shape it into a loaf. Place the shaped dough into a greased loaf pan.
- Second Rise: Cover the loaf pan with a cloth and allow it to rise again until it reaches about 1 inch above the rim of the pan, which should take about 30-45 minutes.
- Preheat the Oven: While the dough is rising, preheat your oven to 350°F.
- Bake the Bread: Once the dough has risen, place the loaf pan in the preheated oven and bake for about 30-33 minutes, or until the top is golden brown and the bread sounds hollow when tapped.
- Cool the Bread: After baking, remove the bread from the oven and let it cool in the pan for 5-10 minutes before transferring it to a wire rack to cool completely.
For best results, always use fresh yeast and store it in the refrigerator to maintain its quality.
Keep an eye on the dough during the rising process; if it’s not rising well, you might need to adjust the temperature of your environment.
Remember, the dough should be smooth and slightly sticky, so avoid adding too much flour, which can result in a dense loaf.
Enjoy your homemade bread with your favorite toppings or as a side to your meals!
Final Thoughts
Although making bread might seem intimidating at first, it can be a rewarding experience that not only fills your home with delightful aromas but also provides you with a delicious final product.
Understanding the historical significance of bread can deepen your appreciation for this staple food. From ancient Egypt to modern bakeries, bread has evolved greatly.
When you choose whole-wheat or sprouted options, you’re not just enjoying a tasty treat; you’re also benefiting from added fiber, protein, and essential nutrients. Whole-wheat bread is particularly rich in dietary fiber, which aids in digestion and helps maintain overall health.
Remember, moderation is key. Bread can fit into a healthy diet when consumed wisely.
FAQ
You might’ve some questions about bread-making, and that’s perfectly normal.
Sourdough bread, for instance, uses wild yeast from a starter, mixed with flour and water. The process includes several steps like bulk proofing and cold proofing for 12-15 hours. This long fermentation process offers health benefits, particularly in digestion and nutrient absorption.
When storing bread, use a cotton bag or towel to keep it moist, and avoid airtight containers to prevent sogginess.
Different types of bread offer various nutritional benefits; whole wheat bread has fiber and essential minerals, while flax bread is rich in protein and antioxidants.
If you’re curious about bread baking terms, remember that artisan bread can be baked freely, while enriched bread includes eggs and sugar.
Understanding these basics will enhance your bread-making experience!
Bread
Ingredients
- Ingredients:
- - 2 ¼ teaspoons active dry yeast
- - 1 ½ cups warm water 105-115°F
- - 1 tablespoon granulated sugar or honey
- - 4-5 cups bread flour or all-purpose flour
- - 2 teaspoons salt
- - 2 tablespoons canola or vegetable oil
Instructions
- Instructions:
- Proof the Yeast: In a small bowl, combine the warm water, yeast, and sugar or honey. Stir gently and let it sit for about 5-10 minutes until it becomes foamy and bubbly. This indicates that the yeast is active and ready to use.
- Mix the Dough: In a large mixing bowl or stand mixer, combine 4 cups of flour and salt. Make a well in the center and pour in the yeast mixture and oil. Gradually add the remaining flour, mixing until the dough begins to pull away from the sides of the bowl.
- Knead the Dough: Turn the dough out onto a lightly floured surface. Knead the dough for about 4-5 minutes using a stand mixer on medium speed or by hand for 5-8 minutes until it's smooth and slightly sticky. Kneading helps develop gluten, which is essential for the texture and shape of the bread.]
- First Rise: Place the kneaded dough in a greased bowl, cover it with a clean cloth or plastic wrap, and leave it in a warm place to rise until it has doubled in size, approximately 1-2 hours.
- Shape the Dough: Once the dough has risen, punch it down to release the air. Turn it out onto a floured surface and shape it into a loaf. Place the shaped dough into a greased loaf pan.
- Second Rise: Cover the loaf pan with a cloth and allow it to rise again until it reaches about 1 inch above the rim of the pan, which should take about 30-45 minutes.
- Preheat the Oven: While the dough is rising, preheat your oven to 350°F.
- Bake the Bread: Once the dough has risen, place the loaf pan in the preheated oven and bake for about 30-33 minutes, or until the top is golden brown and the bread sounds hollow when tapped.
- Cool the Bread: After baking, remove the bread from the oven and let it cool in the pan for 5-10 minutes before transferring it to a wire rack to cool completely.
- For best results, always use fresh yeast and store it in the refrigerator to maintain its quality.
- Keep an eye on the dough during the rising process; if it's not rising well, you might need to adjust the temperature of your environment.
- Remember, the dough should be smooth and slightly sticky, so avoid adding too much flour, which can result in a dense loaf.
- Enjoy your homemade bread with your favorite toppings or as a side to your meals!