potluck desserts
Potluck Desserts
When you think of potluck desserts, what comes to mind? You might picture a table filled with an array of sweet treats, each one bringing its own story and flavor to the gathering. These desserts not only satisfy your sweet tooth, but they also create a sense of community among friends and family. As you consider your next contribution, you may wonder what makes a potluck dessert truly memorable. The answer lies in the balance of simplicity and creativity, and it could change how you approach your next gathering.
Why You’ll Love This Recipe
Indulging in this potluck dessert recipe will have everyone raving about your contribution. You’ll love how easy it’s to prepare, making it perfect for busy days when you want to impress without spending hours in the kitchen. The combination of flavors and textures guarantees that each bite is a delightful experience, catering to different taste preferences.
One of the best aspects of this recipe is its versatility. You can customize it by adding your favorite ingredients, such as nuts, chocolate chips, or seasonal fruits. This flexibility means you can make it your own, and everyone will appreciate the personal touch.
Plus, it’s suitable for various dietary needs, as you can easily adjust the recipe to be gluten-free or dairy-free if necessary.
Presentation matters too, and this dessert looks impressive without requiring advanced skills. Just a simple garnish or a dusting of powdered sugar can elevate its appearance.
Finally, it’s easy to transport, making it a stress-free option for any potluck. With all these benefits, you’ll not only enjoy making this dessert but also feel proud of the delicious treat you bring to the table.
History
Potluck desserts have a rich history that reflects the communal spirit of sharing food. In many cultures, potlucks started as a way for families and friends to gather and celebrate together. When you think about it, these events create a sense of belonging. Traditionally, everyone brings a dish, often a dessert, to share. This practice encourages people to showcase their culinary skills while also providing a variety of treats for everyone to enjoy.
In the early days, these gatherings often took place in community spaces, churches, or family homes. The idea was simple: each person contributed what they could, whether it was a homemade cake, cookies, or a pie. As you participate in a potluck, you become part of this ongoing tradition that connects generations.
Over time, potluck desserts have evolved, with recipes being passed down and adapted. You might notice some dishes have historical significance, representing cultural traditions or celebrations.
Today, these gatherings continue to be popular, allowing you to experience diverse flavors while fostering a sense of community. So, the next time you attend a potluck, remember the rich history behind those delightful desserts on the table.
Recipe
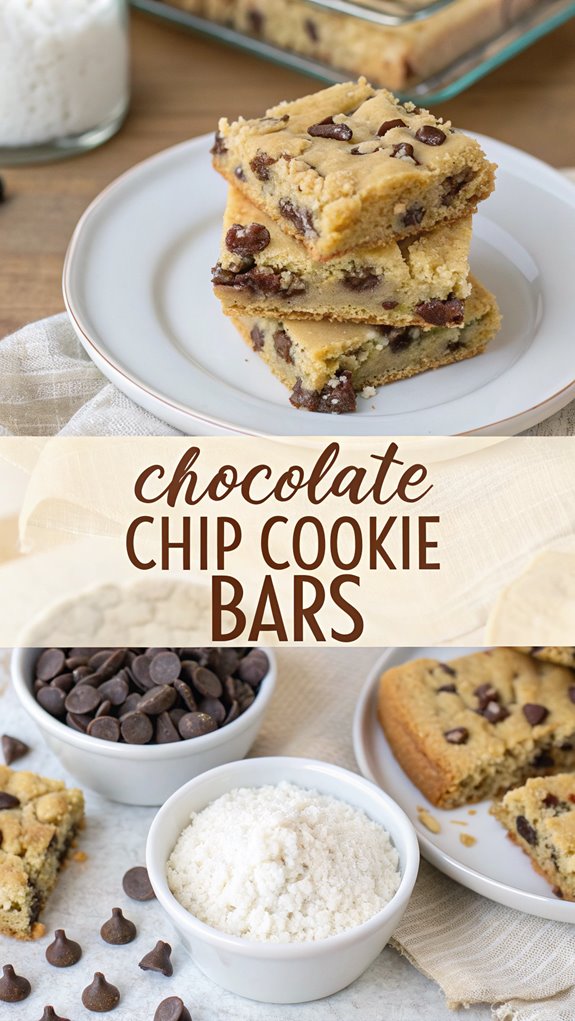
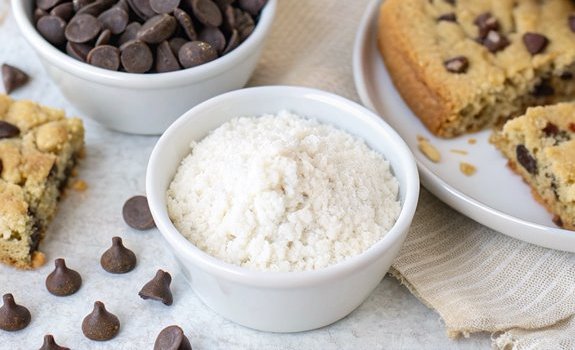
Potluck Desserts: Chocolate Chip Cookie Bars
Chocolate chip cookie bars are a delightful twist on the classic chocolate chip cookie, providing all the gooey, sweet goodness in an easy-to-serve format. These bars are perfect for potlucks because they’re simple to make, can be cut into individual portions, and are sure to please both kids and adults alike.
With their chewy texture and rich chocolate flavor, these cookie bars offer a comforting dessert that everyone will love.
To make these chocolate chip cookie bars, you’ll need to gather a few basic ingredients and follow a straightforward process. The beauty of this recipe is that it requires minimal prep time, making it an ideal choice for those busy days leading up to a potluck.
Once baked, these bars can be cooled, cut into squares, and served on a platter for easy sharing. Your friends and family will be begging for the recipe!
Ingredients:
- 2 1/4 cups all-purpose flour
- 1 teaspoon baking soda
- 1 teaspoon salt
- 1 cup unsalted butter, softened
- 3/4 cup granulated sugar
- 3/4 cup packed brown sugar
- 1 teaspoon vanilla extract
- 2 large eggs
- 2 cups semi-sweet chocolate chips
Cooking Instructions:
- Preheat your oven to 350°F (175°C). Grease a 9×13 inch baking pan or line it with parchment paper for easy removal.
- In a medium bowl, whisk together the flour, baking soda, and salt. Set aside.
- In a large bowl, cream together the softened butter, granulated sugar, brown sugar, and vanilla extract until smooth and creamy.
- Add the eggs one at a time, mixing well after each addition until fully incorporated.
- Gradually add the dry ingredient mixture to the wet ingredients, stirring until just combined. Be careful not to overmix.
- Fold in the semi-sweet chocolate chips until evenly distributed throughout the batter.
- Spread the cookie batter evenly in the prepared baking pan, smoothing the top with a spatula.
- Bake in the preheated oven for 25-30 minutes or until the edges are golden brown and a toothpick inserted in the center comes out clean.
- Allow the cookie bars to cool in the pan for about 10 minutes before transferring them to a wire rack to cool completely. Once cooled, cut into squares and serve.
Extra Tips:
For a fun variation, consider adding nuts or swapping in different types of chocolate chips, such as milk chocolate or white chocolate.
You can also sprinkle a pinch of sea salt on top before baking for an extra flavor boost. If you’re short on time, these cookie bars can be baked a day in advance and stored in an airtight container to keep them fresh.
Enjoy your delicious dessert at the potluck!
Final Thoughts
Dessert lovers will appreciate how easy and satisfying these chocolate chip cookie bars are to prepare for any gathering.
You’ll find that they require simple ingredients and minimal prep time, making them an excellent choice for potluck events. When you bake these bars, the aroma will fill your kitchen, creating anticipation for your guests.
These cookie bars aren’t just tasty; they’re also versatile. You can easily customize them by adding nuts, dried fruit, or even a swirl of caramel for a unique twist.
The flexibility in ingredients means you can cater to different preferences, ensuring everyone at the gathering finds something they enjoy.
Don’t forget to cut the bars into even squares for a neat presentation. You can also pack them in a container that keeps them fresh until you’re ready to serve.
FAQ
When you’re preparing for a potluck, you might’ve questions about these chocolate chip cookie bars. First, how do you store them? It’s best to keep your cookie bars in an airtight container at room temperature. If you’re making them a day in advance, storing them this way helps maintain their freshness.
Next, how far in advance can you bake them? You can make these bars up to three days ahead. Just remember to cool them completely before cutting and storing.
What if you need to transport them? To avoid mess, cut the bars into squares and place them in a single layer in your container. You might also want to use parchment paper to separate layers if you’re stacking them.
Lastly, can you make substitutions? Absolutely! You can swap out chocolate chips for nuts, dried fruits, or even white chocolate, depending on your preference.
If you’re concerned about allergies, consider labeling your dish. This way, everyone can enjoy your delicious treat without worry.
Potluck Desserts
Ingredients
- Ingredients:
- 2 1/4 cups all-purpose flour
- 1 teaspoon baking soda
- 1 teaspoon salt
- 1 cup unsalted butter softened
- 3/4 cup granulated sugar
- 3/4 cup packed brown sugar
- 1 teaspoon vanilla extract
- 2 large eggs
- 2 cups semi-sweet chocolate chips
Instructions
- Cooking Instructions:
- Preheat your oven to 350°F (175°C). Grease a 9x13 inch baking pan or line it with parchment paper for easy removal.
- In a medium bowl, whisk together the flour, baking soda, and salt. Set aside.
- In a large bowl, cream together the softened butter, granulated sugar, brown sugar, and vanilla extract until smooth and creamy.
- Add the eggs one at a time, mixing well after each addition until fully incorporated.
- Gradually add the dry ingredient mixture to the wet ingredients, stirring until just combined. Be careful not to overmix.
- Fold in the semi-sweet chocolate chips until evenly distributed throughout the batter.
- Spread the cookie batter evenly in the prepared baking pan, smoothing the top with a spatula.
- Bake in the preheated oven for 25-30 minutes or until the edges are golden brown and a toothpick inserted in the center comes out clean.
- Allow the cookie bars to cool in the pan for about 10 minutes before transferring them to a wire rack to cool completely. Once cooled, cut into squares and serve.
- Extra Tips:
- For a fun variation, consider adding nuts or swapping in different types of chocolate chips, such as milk chocolate or white chocolate.
- You can also sprinkle a pinch of sea salt on top before baking for an extra flavor boost. If you're short on time, these cookie bars can be baked a day in advance and stored in an airtight container to keep them fresh.