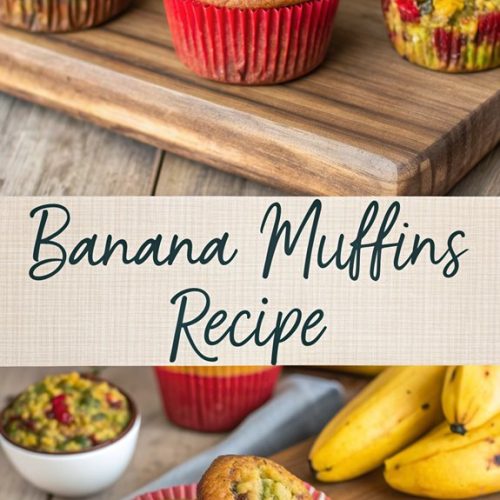
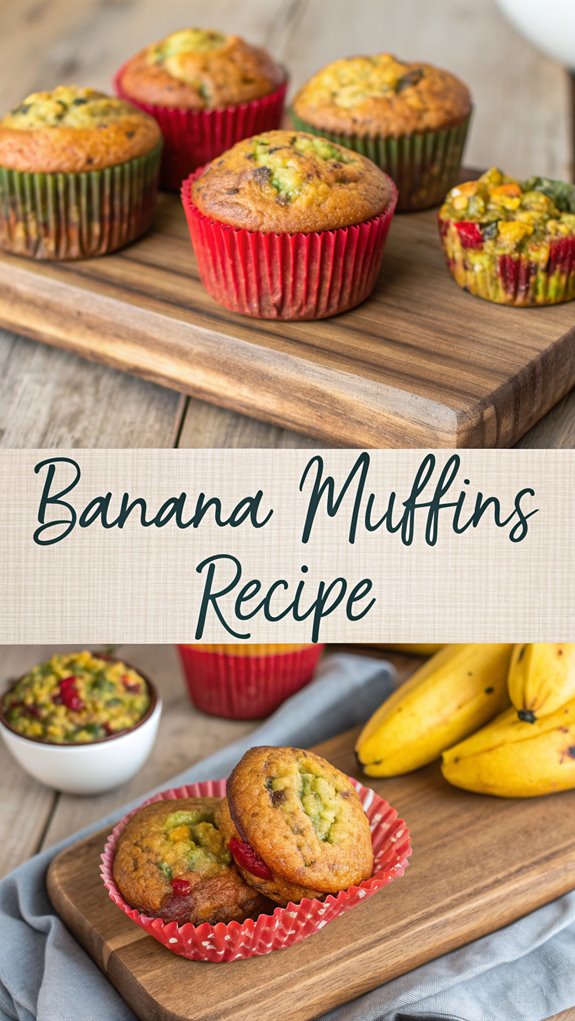
Recent Posts

pasta

pasta

Pasta Pasta is a staple food enjoyed by many people around the world. You might appreciate its versatility, as it can be paired with countless ingredients and flavors. Made from simple ingredients like flour and water, pasta has a rich history, especially in Italy. It’s 

meal planning printable

meal planning printable

Meal Planning Printable Using a meal planning printable can transform how you approach your weekly meals. These tools help you organize your recipes and grocery lists, making meal prep simpler and more efficient. With a structured layout, you can easily track what you have on 

banana muffins

banana muffins

Banana Muffins

Banana muffins are a simple and tasty option for any meal of the day. They’re made with overripe bananas, which give them a naturally sweet flavor and a moist texture. You can whip them up in just 20-25 minutes, making them a quick treat. Plus, they’re easy to customize with nuts or chocolate chips. Curious about how to make these delightful muffins and what makes them so special? Let’s explore further.

Why You’ll Love This Recipe

When you decide to make banana muffins, you’ll quickly discover why they’re such a beloved treat. Their versatility shines as you can enjoy them for breakfast or as a snack, and they’re easy to wrap for lunchboxes. You can choose whole grain options for a healthier twist and customize them with nuts or dried fruits to suit your taste. Nutritionally, they pack a punch, offering fiber, potassium, and essential minerals. The taste is unbeatable, thanks to ripe bananas adding sweetness and moisture, while ingredients like cinnamon contribute warmth. Plus, the recipe is simple, requiring only common ingredients and minimal equipment. With a quick baking time of around 20-25 minutes, you’ll have delicious muffins ready in no time. Additionally, these muffins are made with whole grain flour, providing a nutritious base that enhances their health benefits.

History

The history of banana muffins can be traced back to the late 19th century, when early iterations of banana bread began appearing. These early recipes used banana flour made from dried green bananas.

In 1892, newspaper articles encouraged Queensland banana growers to produce this flour, suggesting it was healthier than wheat flour. As baking powder became available in the 1930s, banana bread recipes started to emerge in North America, with Pillsbury’s 1933 cookbook featuring one of the first American recipes. Notably, the rise of banana flour played a significant role in the development of these early recipes.

During the Great Depression, resourceful housewives created banana bread to avoid wasting overripe bananas. Over the years, banana bread evolved globally, leading to various adaptations, including muffins, which you enjoy today.

Recipe

Banana_Muffins_0001.jpg

Banana muffins are a delightful treat that can brighten any morning or serve as a perfect snack throughout the day. With their moist texture and rich flavor, these muffins are an ideal way to use up overripe bananas. They can be easily customized with various mix-ins, from chocolate chips to nuts, making them a versatile option for both kids and adults. This recipe combines the sweetness of ripe bananas with simple pantry staples to create a quick and easy muffin that everyone will love. Whether you’re serving them for breakfast, brunch, or an afternoon snack, banana muffins are sure to please. Plus, they can be made ahead of time and stored for later, making them a convenient choice for busy days. Ripe bananas not only enhance moisture but also provide natural sweetness, minimizing the need for added sugar.

Ingredients:
– 1 1/2 cups all-purpose flour
– 1 teaspoon baking powder
– 1 teaspoon baking soda
– 1/2 teaspoon salt
– 3 bananas, mashed (approximately 1 1/2 cups)
– 1/3 cup unsalted butter, melted or 6 tbsp melted, unsalted butter, or 1/3 cup coconut oil
– 2 eggs, preferably at room temperature, or just 1 egg
– 3/4 cup granulated sugar, or 1/2 cup maple syrup
– 1 teaspoon vanilla extract
– Optional: 2/3 cup chocolate chips, pecans, or chopped walnuts
– Optional: 1/4 cup old-fashioned oats
– Optional: 1/3 cup light brown sugar for crumb topping
– Optional: 1 teaspoon turbinado (raw) sugar or other granulated sugar for topping

Cooking Instructions:

  1. Preheat your oven to 350°F (175°C) and line a muffin tin with paper liners or grease the tin with cooking spray.
  2. In a large bowl, whisk together the all-purpose flour, baking powder, baking soda, and salt until well combined.
  3. In a separate bowl, mix the melted butter (or coconut oil), mashed bananas, eggs, granulated sugar (or maple syrup), and vanilla extract until smooth and well combined.
  4. Pour the wet ingredients into the dry ingredients and stir gently until just moistened. Be careful not to overmix; a few lumps are fine.
  5. If you’re using any optional add-ins, such as chocolate chips or nuts, fold them into the batter at this stage.
  6. Divide the batter evenly among the prepared muffin tin, filling each cup about 2/3 full.
  7. For the crumb topping (if using), mix together the flour, light brown sugar, and cinnamon in a small bowl. Cut in the butter until the mixture resembles coarse crumbs, then sprinkle over the muffin batter.
  8. If desired, sprinkle turbinado sugar on top for added crunch.
  9. Bake in the preheated oven for 18-22 minutes, or until a toothpick inserted into the center comes out clean.
  10. Allow the muffins to cool in the tin for a few minutes before transferring them to a wire rack to cool completely.

For extra tips, make sure your bananas are very ripe for the best flavor and sweetness. You can also experiment with different types of sugar or add spices like cinnamon or nutmeg for an extra flavor boost.

If you want to make these muffins even healthier, consider substituting half of the all-purpose flour with whole wheat flour and reducing the sugar slightly. Enjoy your homemade banana muffins fresh out of the oven or store them in an airtight container for later!

Final Thoughts

Though banana muffins are easy to make and delicious, there are several key points to contemplate for the best results.

First, consider the nutritional content; a medium muffin packs about 348 calories, 53.5g of carbohydrates, and 18g of sugar. Choosing ripe bananas not only adds natural sweetness but also moisture, enhancing the texture. If you have overripe bananas, don’t waste them—use them in your muffins! Additionally, keep in mind that a serving of banana muffin contains 0.5g of total fats, which is relatively low compared to other baked goods.

Remember, mixing wet and dry ingredients separately and avoiding overmixing helps keep your muffins light. You can customize your recipe with nuts or chocolate chips for added flavor.

Finally, homemade muffins tend to be smaller than store-bought, making portion control easier while still contributing to your daily fruit intake. Enjoy baking!

FAQ

What do you want to know about banana muffins? If you’re curious about ingredients, use about 1 1/2 cups of mashed bananas, or roughly three medium-sized bananas.

For flavor, consider adding spices like cinnamon or nutmeg. When baking, start at 425°F for five minutes to help them rise, then lower to 350°F for 15-20 minutes. Baking powder and baking soda are essential for achieving the desired puffiness in your muffins.

To avoid dense muffins, don’t overmix your batter. Once baked, let them cool in the pan briefly before transferring to a wire rack.

For storage, keep them in an airtight container or freeze for later use. If you need ripe bananas quickly, bake them at 350°F for about ten minutes until blackened.

Enjoy your delicious banana muffins!

Banana Muffins

Ingredients
  

  • Ingredients:
  • - 1 1/2 cups all-purpose flour
  • - 1 teaspoon baking powder
  • - 1 teaspoon baking soda
  • - 1/2 teaspoon salt
  • - 3 bananas mashed (approximately 1 1/2 cups)
  • - 1/3 cup unsalted butter melted or 6 tbsp melted, unsalted butter, or 1/3 cup coconut oil
  • - 2 eggs preferably at room temperature, or just 1 egg
  • - 3/4 cup granulated sugar or 1/2 cup maple syrup
  • - 1 teaspoon vanilla extract
  • - Optional: 2/3 cup chocolate chips pecans, or chopped walnuts
  • - Optional: 1/4 cup old-fashioned oats
  • - Optional: 1/3 cup light brown sugar for crumb topping
  • - Optional: 1 teaspoon turbinado raw sugar or other granulated sugar for topping

Instructions
 

  • Cooking Instructions:
  • Preheat your oven to 350°F (175°C) and line a muffin tin with paper liners or grease the tin with cooking spray.
  • In a large bowl, whisk together the all-purpose flour, baking powder, baking soda, and salt until well combined.
  • In a separate bowl, mix the melted butter (or coconut oil), mashed bananas, eggs, granulated sugar (or maple syrup), and vanilla extract until smooth and well combined.
  • Pour the wet ingredients into the dry ingredients and stir gently until just moistened. Be careful not to overmix; a few lumps are fine.
  • If you're using any optional add-ins, such as chocolate chips or nuts, fold them into the batter at this stage.
  • Divide the batter evenly among the prepared muffin tin, filling each cup about 2/3 full.
  • For the crumb topping (if using), mix together the flour, light brown sugar, and cinnamon in a small bowl. Cut in the butter until the mixture resembles coarse crumbs, then sprinkle over the muffin batter.
  • If desired, sprinkle turbinado sugar on top for added crunch.
  • Bake in the preheated oven for 18-22 minutes, or until a toothpick inserted into the center comes out clean.
  • Allow the muffins to cool in the tin for a few minutes before transferring them to a wire rack to cool completely.
  • For extra tips, make sure your bananas are very ripe for the best flavor and sweetness. You can also experiment with different types of sugar or add spices like cinnamon or nutmeg for an extra flavor boost.
  • If you want to make these muffins even healthier, consider substituting half of the all-purpose flour with whole wheat flour and reducing the sugar slightly. Enjoy your homemade banana muffins fresh out of the oven or store them in an airtight container for later!
pork chop recipes

pork chop recipes

Pork Chop Recipes Pork chops have graced dinner tables for centuries, bringing comfort and satisfaction to many. Whether you prefer them pan-fried, baked, or grilled, there’s a recipe that suits your taste. The key to a great pork chop lies in seasoning and cooking techniques, 

pasta recipe

pasta recipe

Pasta Recipe When you’re ready to whip up a satisfying pasta dish, it’s vital to understand the steps involved. Start by boiling a generous amount of water and adding salt for flavor. Meanwhile, you’ll want to prepare a fresh sauce with garlic, ginger, and vegetables. 

recipes pasta

recipes pasta

Recipes Pasta

When it comes to recipes for pasta, you’ll discover a world of flavors and textures waiting for you. With just a few ingredients, like pasta, fresh vegetables, and a savory sauce, you can whip up a delicious meal. Understanding the basics of cooking pasta al dente and sautéing your veggies will enhance your dish considerably. Curious about the different variations and techniques? Let’s explore the essentials that will elevate your pasta-making skills.

Why You’ll Love This Recipe

When you try this pasta recipe, you’ll quickly discover why it’s a favorite for many home cooks. This dish not only satisfies your taste buds but also packs a nutritional punch.

The complex carbohydrates in pasta provide sustained energy, perfect for busy days. If you’re mindful of your weight, the high protein content helps curb overeating. Plus, with low fat and cholesterol levels, it supports heart health. Fresh pasta is particularly rich in protein due to its egg content, making it beneficial for muscle growth.

You’ll appreciate that whole wheat and chickpea varieties offer additional fiber and nutrients. The recipe is versatile, allowing for quick meals or one-pot options that save time.

Add some veggies or lean proteins to enhance the dish’s nutritional value. You’ll find it’s both delicious and beneficial for your overall health.

History

Pasta has a rich history that spans thousands of years, making it more than just a delicious dish. You can trace its origins back to the Etruscan civilization in the 4th century BC, where tools for rolling pasta were discovered.

In the 1st century BC, Roman poet Horace mentioned sheets of dough called lagana. Meanwhile, ancient China was crafting noodle-like foods as early as 3000 BC. By the 12th century, spaghetti production was being done in Sicily. Over the centuries, pasta became a staple across Italy and eventually reached the United States in the late 19th century.

Today, pasta is celebrated worldwide, enjoyed in various forms and styles, reflecting its enduring appeal throughout history.

Recipe

Recipes_Pasta_0001.jpg

Ingredients:
– 200g pasta (penne, fusilli, or your choice)
– 1 cup mixed vegetables (carrots, peas, bell peppers)
– 2 ripe tomatoes (or 1 cup tomato puree)
– 1 teaspoon garam masala
– 1 teaspoon coriander powder
– 1 teaspoon Kashmiri red chili powder
– 1/2 teaspoon turmeric
– 1 tablespoon kasuri methi (dried fenugreek leaves)
– Salt (to taste)
– 2 tablespoons olive oil
Fresh herbs for garnish (optional)

Cooking Instructions:

  1. Begin by bringing a large pot of salted water to a rolling boil. Once boiling, add the pasta and stir immediately to prevent sticking. Cook according to package instructions until al dente, usually around 8-10 minutes.
  2. While the pasta cooks, heat olive oil in a separate pan over medium heat. Add the mixed vegetables and sauté for about 3-4 minutes until they begin to soften but remain crisp. Masala Pasta is an Indian-Italian fusion dish that caters to various spice levels, making it a versatile option for all ages.
  3. If using ripe tomatoes, chop them and add to the pan with the sautéed vegetables. If using tomato puree, add it directly. Stir well and let it cook for another 5 minutes until the mixture is heated through.
  4. Add the garam masala, coriander powder, Kashmiri red chili powder, turmeric, and kasuri methi to the vegetable and tomato mixture. Stir to combine and cook for an additional 2 minutes to allow the spices to release their flavors.
  5. Once the pasta is cooked, reserve about half a cup of the starchy pasta water, then drain the pasta. Add the drained pasta to the vegetable sauce and toss to combine. If the mixture appears dry, add a splash of the reserved pasta water to achieve the desired consistency.
  6. Taste and adjust seasoning with salt as needed. Serve hot, garnished with fresh herbs if desired.

Extra Tips:

When cooking pasta, always use a large pot to allow the pasta to move freely and cook evenly.

Reserve some starchy pasta water as it’s a great way to enhance the sauce’s consistency and flavor.

Experiment with different vegetable combinations or add proteins like cooked chicken or tofu for a heartier dish.

Remember to serve immediately to enjoy the best texture and flavor!

Final Thoughts

Though cooking pasta may seem straightforward, mastering the fundamentals can elevate your dish considerably.

Start by using enough water—4 to 6 quarts per pound of dry pasta—bringing it to a rolling boil before adding your pasta. Don’t forget to add about 2 tablespoons of salt to prevent sticking. Providing ample space in the pot helps prevent sticking and allows the pasta to cook freely.

Stir the pasta occasionally and taste it halfway through the cooking time to check for that perfect al dente texture. Remember to drain it immediately once it reaches the right doneness, and consider reserving some cooking water for your sauce.

Choosing high-quality pasta and pairing the right shapes with suitable sauces will enhance your meal.

With these tips, you’ll create delicious pasta dishes that impress every time.

FAQ

How do you guarantee your pasta turns out perfectly every time? Start by using 1 liter of water for every 100 grams of pasta, ensuring you have enough space to cook without sticking.

When boiling, add 10 grams of salt per liter of water for flavor and to prevent clumping. Always add salt to boiling water, and stir the pasta occasionally. Using a lid can help speed up the boiling process, ensuring your water reaches a rolling boil faster.

Follow the package directions for cooking times, but taste it to check for that al dente bite. If you plan to sauce it, undercook by about a third.

Finally, don’t run cold water over drained pasta; instead, keep it moist by reserving some cooking water to help bind it with your sauce.

Recipes Pasta

Ingredients
  

  • Ingredients:
  • - 200g pasta penne, fusilli, or your choice
  • - 1 cup mixed vegetables carrots, peas, bell peppers
  • - 2 ripe tomatoes or 1 cup tomato puree
  • - 1 teaspoon garam masala
  • - 1 teaspoon coriander powder
  • - 1 teaspoon Kashmiri red chili powder
  • - 1/2 teaspoon turmeric
  • - 1 tablespoon kasuri methi dried fenugreek leaves
  • - Salt to taste
  • - 2 tablespoons olive oil
  • - Fresh herbs for garnish optional

Instructions
 

  • Cooking Instructions:
  • Begin by bringing a large pot of salted water to a rolling boil. Once boiling, add the pasta and stir immediately to prevent sticking. Cook according to package instructions until al dente, usually around 8-10 minutes.
  • While the pasta cooks, heat olive oil in a separate pan over medium heat. Add the mixed vegetables and sauté for about 3-4 minutes until they begin to soften but remain crisp. Masala Pasta is an Indian-Italian fusion dish that caters to various spice levels, making it a versatile option for all ages.
  • If using ripe tomatoes, chop them and add to the pan with the sautéed vegetables. If using tomato puree, add it directly. Stir well and let it cook for another 5 minutes until the mixture is heated through.
  • Add the garam masala, coriander powder, Kashmiri red chili powder, turmeric, and kasuri methi to the vegetable and tomato mixture. Stir to combine and cook for an additional 2 minutes to allow the spices to release their flavors.
  • Once the pasta is cooked, reserve about half a cup of the starchy pasta water, then drain the pasta. Add the drained pasta to the vegetable sauce and toss to combine. If the mixture appears dry, add a splash of the reserved pasta water to achieve the desired consistency.
  • Taste and adjust seasoning with salt as needed. Serve hot, garnished with fresh herbs if desired.
uk drinking tea

uk drinking tea

Uk Drinking Tea A warm cup of tea symbolizes comfort and community in the UK, where nearly everyone enjoys this daily ritual. As you explore the fascinating history of tea and its evolution, you’ll discover how it connects people across generations. From classic blends to 

pork chops

pork chops

Pork Chops It’s funny how pork chops can remind you of family gatherings, yet they’re simple enough to enjoy on a weeknight. These cuts of meat are not only tasty but also packed with protein, making them a great choice for healthy meals. If you’re 

6 recipes

6 recipes

6 Recipes

If you’re looking to expand your cooking skills, exploring six diverse recipes is a great start. Each recipe brings unique flavors and techniques, making meal preparation both fun and rewarding. You’ll discover everything from savory pastas to invigorating salads, and even comforting desserts. Ready to elevate your culinary game? Let’s explore the history and details of these recipes, so you can impress your family and friends with your new skills.

Why You’ll Love This Recipe

When you try a new recipe, you open the door to a world of flavors and experiences that can make cooking enjoyable and fulfilling.

You’ll discover that following a recipe allows you to express your creativity, helping you relax while you cook. It also gives you control over ingredients and portion sizes, which can lead to healthier meals. Additionally, cooking encourages exploration of new foods and cuisines, allowing you to discover ingredients you may have previously overlooked.

Plus, recipes introduce you to new cuisines, expanding your culinary knowledge. They provide clear instructions, ensuring consistent results and food safety.

By planning meals with recipes, you can reduce food waste and cater to specific dietary needs.

Ultimately, using recipes makes cooking more enjoyable, boosts your confidence, and can even create special moments with family and friends.

History

Cooking has a rich and fascinating history that stretches back thousands of years. You might be surprised to learn that by the 5th century, bok choy was already growing in China, while the Roman cookbook Apicius was published.

Fast forward to the 8th century, and you’ll find narezushi introduced to Japan and Roquefort cheese being transported across the Alps.

In the 9th century, cucumber cultivation began in France, and by the 11th century, Ireland was aging butter in peat bogs. Notably, the domestication of staple crops such as rice and wheat marked pivotal agricultural advancements during this period.

The 18th century saw the rise of soufflés in France and the first appearances of pizza in Naples.

Each of these developments laid the groundwork for the diverse culinary traditions we enjoy today.

Recipe

6_Recipes_0001.jpg

Ingredients:
– 8 oz fettuccine pasta
– 2 tablespoons olive oil
– 4 cloves garlic, minced
– 1 cup heavy cream
– 1 cup grated Parmesan cheese
– Salt, to taste
– Freshly ground black pepper, to taste
– Fresh parsley, chopped (for garnish)

Instructions:
1. Cook the fettuccine pasta according to package instructions in a large pot of salted boiling water until al dente. Reserve ½ cup of the pasta cooking water, then drain the pasta and set aside.

  1. In a large skillet, heat the olive oil over medium heat. Add the minced garlic and sauté until fragrant and golden, about 1-2 minutes. Be careful not to burn the garlic.
  2. Pour in the heavy cream and bring the mixture to a simmer. Reduce the heat to low and stir in the grated Parmesan cheese until melted and smooth. If the sauce is too thick, add some reserved pasta water to reach your desired consistency.
  3. Add the cooked fettuccine to the skillet, tossing to coat the pasta in the creamy sauce. Season with salt and freshly ground black pepper to taste.
  4. Serve immediately, garnished with chopped parsley and additional Parmesan if desired.

For the best results, use freshly grated Parmesan cheese as it melts more smoothly into the sauce compared to pre-grated options. Clear instructions contribute to successful recipe execution, so follow each step carefully. You can also experiment with adding cooked vegetables like spinach or sun-dried tomatoes for extra flavor and nutrition.

Enjoy your creamy garlic Parmesan pasta!

Final Thoughts

Final thoughts on recipes reveal that understanding how to evaluate and engage with them can greatly enhance your cooking experience.

When you look at a recipe, consider its clarity, ease of following, and the availability of ingredients. A good recipe should list ingredients clearly and provide precise or descriptive measurements.

Engaging with recipes can also be enjoyable; you might read them like a book or share them on social media. Don’t hesitate to modify recipes to suit your taste, blending ideas from different sources. Good recipes invite trust and lead to better culinary experiences.

Ultimately, as you explore new formats and styles, remember the importance of sustainable ingredients. Embrace the evolving world of recipes, and you’ll find joy and satisfaction in your culinary adventures.

FAQ

Have you ever found yourself puzzled by a recipe or unsure how to tackle a cooking challenge? Don’t worry; it happens to everyone!

First, check the ingredient list and confirm you used the right amounts. If you made substitutions, know they can change the dish’s taste and texture. Reading comments from others can provide helpful insights. If you’re still stuck, leave a comment to ask for feedback.

Preparation is key—make certain you have all ingredients ready and follow the instructions closely. Consider dietary needs when choosing recipes and look for those labeled as healthy or special diets. For instance, when preparing a dish like chicken and rice, it’s important to carefully layer the chicken on top of the rice mixture for even cooking.

Finally, remember to preheat your oven and use the right cooking techniques for best results. Happy cooking!

6 Recipes

Ingredients
  

  • Ingredients:
  • - 8 oz fettuccine pasta
  • - 2 tablespoons olive oil
  • - 4 cloves garlic minced
  • - 1 cup heavy cream
  • - 1 cup grated Parmesan cheese
  • - Salt to taste
  • - Freshly ground black pepper to taste
  • - Fresh parsley chopped (for garnish)

Instructions
 

  • Instructions:
  • Cook the fettuccine pasta according to package instructions in a large pot of salted boiling water until al dente. Reserve ½ cup of the pasta cooking water, then drain the pasta and set aside.
  • In a large skillet, heat the olive oil over medium heat. Add the minced garlic and sauté until fragrant and golden, about 1-2 minutes. Be careful not to burn the garlic.
  • Pour in the heavy cream and bring the mixture to a simmer. Reduce the heat to low and stir in the grated Parmesan cheese until melted and smooth. If the sauce is too thick, add some reserved pasta water to reach your desired consistency.
  • Add the cooked fettuccine to the skillet, tossing to coat the pasta in the creamy sauce. Season with salt and freshly ground black pepper to taste.
  • Serve immediately, garnished with chopped parsley and additional Parmesan if desired.
  • For the best results, use freshly grated Parmesan cheese as it melts more smoothly into the sauce compared to pre-grated options. Clear instructions contribute to successful recipe execution, so follow each step carefully. You can also experiment with adding cooked vegetables like spinach or sun-dried tomatoes for extra flavor and nutrition.
  • Enjoy your creamy garlic Parmesan pasta!
free food

free food

Free Food You might think free food isn’t important, but it actually plays a key role in helping those who struggle with hunger. Many programs, like free school meals and food banks, provide essential nutrition to kids and families. These initiatives not only support health