Recent Posts

sausage and veggie sheet pan

sausage and veggie sheet pan

Sausage and Veggie Sheet Pan Picture a vibrant array of roasted vegetables, their edges crisping up while savory sausages sizzle alongside, creating a mouthwatering medley of flavors on a single sheet pan. You might appreciate how this dish simplifies your weeknight cooking without sacrificing taste 

peanut butter banana muffins healthy

peanut butter banana muffins healthy

Peanut Butter Banana Muffins Healthy You might be surprised to find that Peanut Butter Banana Muffins can be both delicious and healthy. With their blend of protein, fiber, and natural sweetness, they offer a satisfying snack without compromising on taste. Plus, the use of ingredients 

glazed lemon loaf

glazed lemon loaf

Glazed Lemon Loaf

When you think of a perfect balance between sweetness and tang, glazed lemon loaf likely comes to mind. Its moist texture and zesty glaze make it a versatile choice for any meal or snack. You may be surprised to learn about its rich history and how it has transformed over the centuries. As you explore the nuances of this delightful treat, you’ll find the recipe can easily cater to various dietary needs. But what makes this loaf truly unique isn’t just its flavor—there’s more to its story than you might expect.

Why You’ll Love This Recipe

When you take a bite of this glazed lemon loaf, you’ll immediately appreciate its moist and light texture, which makes it a delightful treat. This recipe balances lemon flavors perfectly, with the glaze adding an extra zesty kick. Plus, it’s incredibly easy to prepare, requiring minimal effort and time. You can enjoy this loaf as a breakfast item, dessert, or snack, making it versatile for any occasion. If you have dietary restrictions, don’t worry! It can be adapted to be gluten-free, dairy-free, or nut-free. With its simple ingredients and quick prep time, you’ll find that baking this loaf fits easily into your busy life, ensuring everyone can enjoy a delicious slice whenever they want. Additionally, the recipe features a gluten-free version that caters to those following specific dietary needs.

History

The glazed lemon loaf has a rich history that dates back to the 1700s in England, where it emerged as a type of pound cake. Known as lemon drizzle cake in Britain, it’s often enjoyed during afternoon tea. In Germany, it’s called Saint Barbara’s cake and is traditionally made for the feast of St. Barbara on December 4. Over time, the loaf adapted to various cultures, leading to American variations like lemon pound cake, which features a sweet and tangy glaze. Some recipes even include ricotta for added moisture. This delightful cake is celebrated globally, with each region adding its unique flavors and ingredients, making it a versatile treat for leisure and special occasions. The origins of the loaf are also influenced by the abundance of citrus fruits in regions like California.

Recipe

Glazed_Lemon_Loaf_0001.jpg

Glazed Lemon Loaf

Indulge in the invigorating taste of a homemade glazed lemon loaf, perfect for any occasion. This sweet and tangy treat is a delightful way to brighten your day, featuring a moist and tender crumb infused with zesty lemon flavor. The glaze adds an extra layer of sweetness that beautifully contrasts the tartness of the lemon, making it a favorite for both dessert lovers and citrus enthusiasts alike. The loaf is made using simple mixing tools, ensuring that everyone can enjoy this delightful recipe with ease.

Whether you’re enjoying it with a cup of tea or serving it at a gathering, this lemon loaf is sure to impress.

Making a glazed lemon loaf is a straightforward process that yields delicious results. With simple ingredients that you likely already have on hand, you can whip up this delightful loaf in no time. The combination of sour cream (or milk) and oil keeps the loaf moist, while the fresh lemon juice and zest infuse it with bright, citrusy flavors.

Follow this recipe, and you’ll have a golden-brown loaf that’s perfect for slicing and sharing.

Ingredients:
– 1-2 cups all-purpose flour
– 1-2 teaspoons baking powder
– ½ teaspoon salt
– 1 cup granulated sugar
– 1 cup full-fat sour cream or milk
– 3 tablespoons fresh lemon juice
– 2 tablespoons lemon zest
– 2 large eggs
– 1 teaspoon vanilla extract
– ½ cup canola or vegetable oil
– 1 cup powdered sugar
– 2-4 tablespoons fresh lemon juice (for glaze)
– Optional lemon zest for decoration

Cooking Instructions:
1. Preheat your oven to 350°F (175°C) and grease a 9×5 loaf pan to guarantee easy removal of the loaf once baked.
2. In a mixing bowl, whisk together the all-purpose flour, baking powder, and salt until well combined. Set aside.
3. In another bowl, whisk together the granulated sugar, sour cream (or milk), fresh lemon juice, lemon zest, eggs, vanilla extract, and canola oil until smooth and creamy.
4. Gently combine the wet and dry ingredients, stirring just until everything is mixed together. Be careful not to overmix, as this can affect the texture of the loaf.
5. Pour the batter into the prepared loaf pan and spread it evenly. Bake in the preheated oven for 50-60 minutes, or until a toothpick inserted into the center comes out clean.
6. While the loaf is baking, prepare the lemon glaze by whisking together the powdered sugar and fresh lemon juice in a small bowl. Adjust the consistency by adding more powdered sugar for thickness or more lemon juice for a thinner glaze.
7. Once the loaf is done baking, allow it to cool in the pan for about 10 minutes before transferring it to a wire rack to cool completely. Once cooled, drizzle the lemon glaze over the top and, if desired, sprinkle with additional lemon zest for decoration.

For extra tips when making your glazed lemon loaf, make sure that your ingredients are at room temperature for the best mixing results.

If you prefer a more intense lemon flavor, you can increase the amount of lemon juice and zest in both the batter and glaze. Additionally, feel free to experiment by adding poppy seeds to the batter for a delightful twist, or serve slices with a dollop of whipped cream for an extra indulgence.

Enjoy your baking!

Final Thoughts

Whether you’re baking for a special occasion or just treating yourself, making a glazed lemon loaf is a rewarding experience. To guarantee the best results, use fresh lemon juice and high-quality ingredients. Once baked, let the loaf cool completely before glazing it to achieve the perfect finish. It’s also important to use room temperature ingredients for better rise and texture. Store any leftovers in the fridge after the first day to keep it fresh, or freeze it if you need to save it for later. Remember, the loaf lasts about 2-3 days at room temperature. If you want to lighten it up, use non-fat Greek yogurt or applesauce. Finally, don’t hesitate to experiment with different citrus fruits or sweeteners for a personalized twist. Enjoy your baking journey!

FAQ

Baking a glazed lemon loaf can spark a lot of questions, especially if it’s your first time or if you’re looking to make variations.

For your loaf, you’ll need eggs for moisture, sugar for sweetness, and plenty of lemon zest, juice, and extract for that bright flavor. Flour can be swapped for gluten-free if needed, while yogurt or sour cream adds tenderness. Additionally, this recipe is a great way to enjoy a low calorie treat without compromising your dietary goals.

Remember to preheat your oven to 350°F and mix your ingredients until combined. Bake for 45-50 minutes, then cool before glazing with icing sugar and lemon juice.

You can store leftovers in the fridge or freeze them. Feel free to adjust sweetness or lemon intensity and try different toppings for extra flair!

new year’s eve party food

new year’s eve party food

New Year’s Eve Party Food As the clock inches closer to midnight, the air fills with the savory scents of roasted meats and sweet pastries, inviting your guests to indulge. You know that what you serve can set the tone for the evening, and a 

top 5 bbq grills for every budget

top 5 bbq grills for every budget

Top 5 Bbq Grills for Every Budget When you’re on the hunt for the perfect BBQ grill, it’s crucial to find one that fits your budget and grilling style. You might be surprised by how many quality options are available, whether you’re looking to spend 

oatmeal chocolate chip cookies

oatmeal chocolate chip cookies

Oatmeal Chocolate Chip Cookies

Did you know that oatmeal chocolate chip cookies can have around 148 calories each, making them a relatively lighter dessert option? Their unique blend of heartiness from oats and sweetness from chocolate chips creates a delightful texture that many find irresistible. You might be surprised by how easily you can customize them, whether you prefer dark chocolate, nuts, or even some added nutrition. But what makes this treat stand out among other cookie options? Consider how the history and variations of this recipe can influence your baking experience.

Why You’ll Love This Recipe

When you try this oatmeal chocolate chip cookie recipe, you’ll quickly discover why it’s a favorite among cookie lovers.

These cookies are incredibly versatile, allowing you to add nutritious ingredients like dried fruits, peanut butter, or dark chocolate. You can boost their nutritional value by using whole-wheat flour or adding flax seeds. Additionally, oatmeal cookies have fewer calories than peanut butter and sugar cookies, making them a lighter option for dessert.

Oats provide health benefits such as improved digestion and lower cholesterol, making these cookies a smarter choice. Plus, they’re easy to make, requiring just basic ingredients, and bake to perfection in 8-10 minutes.

With options for customization, like nut-free alternatives or various sugars, you can adjust the flavors to your liking. Best of all, they store well and freeze for long-term enjoyment.

History

Although chocolate chip cookies often steal the spotlight, oatmeal cookies have a rich history that dates back to the late 19th century.

Originating from Scottish oatcakes, they evolved into baked treats during Victorian times. The first recorded oatmeal cookie recipes emerged in the late 1800s, with Fannie Merritt Farmer popularizing the oatmeal raisin cookie.

Quaker Oats played a significant role in promoting oatmeal cookies as a healthy snack through effective marketing. Over time, variations like chocolate chip and nut-infused versions appeared, but the traditional recipe remains beloved. The chocolate chip cookie, which was invented in 1938, became a cultural phenomenon that further influenced the popularity of oatmeal cookies as well.

With ingredients like oats, brown sugar, butter, and flour, these warm, cinnamon-scented cookies quickly gained popularity, becoming a staple in many American households as a comforting treat.

Recipe

Oatmeal_Chocolate_Chip_Cookies_0001.jpg

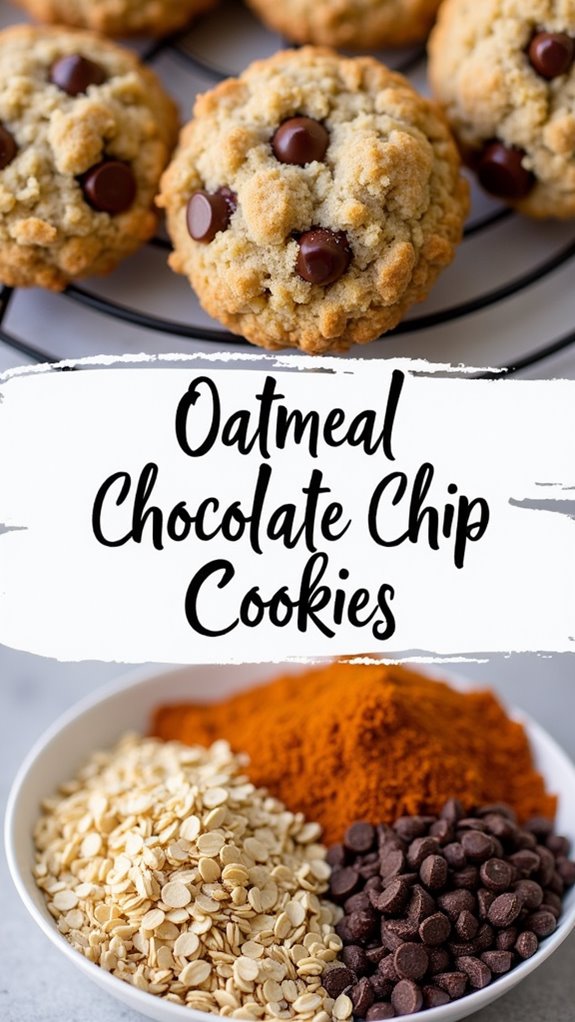
Oatmeal Chocolate Chip Cookies are a delightful twist on the classic chocolate chip cookie, combining the hearty texture of oats with the rich sweetness of chocolate. These cookies are perfect for any occasion, whether you’re baking for a family gathering or just treating yourself to a homemade dessert. With a soft and chewy center and lightly browned edges, these cookies are bound to satisfy your sweet tooth. Each cookie contains approximately 148 calories, making them a delicious treat that you can enjoy without too much guilt.

Making these cookies isn’t only simple but also quick, with a total preparation and cooking time of about 30 minutes. You can whip up a batch in no time, and the best part is that they can be customized to suit your taste. Feel free to experiment with different types of chocolate chips or add in your favorite nuts for an extra crunch.

Ingredients:
– 1-1 1/2 cups all-purpose flour
– 1/2-1 teaspoon baking soda
– 1-1 1/2 cups sugar (brown or light brown and granulated)
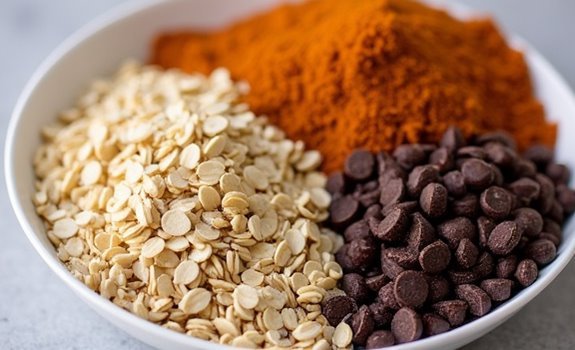
– 2-3 cups oats (rolled or old-fashioned)
– 1-2 cups chocolate chips (semi-sweet)

Instructions:
1. Preheat your oven to 350°F (175°C).
2. In a medium bowl, whisk together the all-purpose flour, baking soda, and salt (add cinnamon if desired).
3. In a large mixing bowl, cream together the butter and sugars until light and fluffy. Then, add in the eggs and vanilla extract, mixing until well combined.
4. Gradually incorporate the dry ingredients into the wet mixture, mixing on low speed until just combined.
5. Gently fold in the chocolate chips until evenly distributed throughout the dough.
6. For best results, chill the dough in the refrigerator for 30 minutes to 1 hour (this step is optional but recommended).
7. Using a small cookie scoop or by rolling the dough into 1-inch balls, place the cookies on a baking sheet lined with parchment paper.
8. Bake in the preheated oven for 10-12 minutes or until the edges are lightly browned.
9. Allow the cookies to cool on the baking sheet for 5 minutes before transferring them to a cooling rack to cool completely.

When baking oatmeal chocolate chip cookies, keep in mind that the dough will spread a little during baking, so be sure to leave space between the cookie dough balls on the baking sheet.

Additionally, for a more intense flavor, you might want to use a mixture of dark and semi-sweet chocolate chips. Don’t forget to check the cookies a minute or two before the recommended baking time to verify they don’t overbake, as they’ll continue to firm up once removed from the oven.

Enjoy your delicious cookies!

Final Thoughts

Baking oatmeal chocolate chip cookies brings joy and satisfaction not just through the delicious treats you create but also in the memories made while sharing them with loved ones.

Remember, these cookies can vary greatly in calories and nutrition. For example, Potbelly’s version has 420 calories, while Nestle Toll House offers a lighter option at 130 calories. This variation highlights the importance of understanding nutritional information when choosing which cookies to indulge in.

To make healthier choices, consider using less sugar, more fiber-rich oats, and lower-fat butter. Experiment with different ingredients, like nuts or dried fruits, to find your perfect mix.

Store your cookies in airtight containers to keep them fresh.

Finally, enjoy the baking process and share the results—baking should be a fun and rewarding experience!

FAQ

Got questions about oatmeal chocolate chip cookies? You’re not alone! Many bakers wonder about the right ingredients. Use packed brown sugar for a soft, chewy texture, and feel free to mix old-fashioned rolled oats with quick oats for a great consistency.

Semi-sweet chocolate chips are popular, but butterscotch chips can add a fun twist. For best results, chill your dough for at least 45 minutes to prevent overspreading. When baking, set your oven to 350°F (175°C) and aim for 9-11 minutes in the oven. Remember, chilling the dough helps maintain the cookie shape while baking.

If you’re concerned about overcooking, remove the cookies when the edges are set but the centers look soft. Store your cookies in an airtight container for up to four days. Happy baking!

thai yellow curry

thai yellow curry

Thai Yellow Curry Is it true that Thai Yellow Curry, or Gaeng Garee, blends the influences of Indian and Thai cooking? You might find this intriguing, as the dish’s vibrant color and creamy texture have roots in both culinary traditions. With its mild spice and 

lemon loaf

lemon loaf

Lemon Loaf Lemon loaf isn’t just any cake; its bright, zesty flavor can transform a mundane afternoon into a rejuvenating experience. With its roots in British baking, this moist treat offers both nostalgia and versatility, catering to a variety of dietary preferences. You might find 

abc soup

abc soup

Abc Soup

When you think about comforting meals, ABC Soup might not be the first dish that comes to mind, but it deserves your attention. This versatile blend of vegetables, meat, and spices not only packs a nutritional punch but also reflects a fascinating culinary journey from its Ukrainian roots to its popularity in Malaysia. You’ll find that its simple preparation methods allow for endless customization, catering to any palate. But what makes this soup truly special goes beyond just its ingredients—there’s a rich history that connects cultures and flavors. Curious to explore its origins?

Why You’ll Love This Recipe

When you try ABC soup, you’ll quickly discover why it’s a beloved recipe for many. This soup is packed with nutritional benefits, offering vitamins A, B, and C from its fresh ingredients. Each serving provides a healthy dose of fiber and potassium while remaining low in calories, making it an excellent choice for a balanced meal. Its versatility shines through, allowing you to mix in chicken, corn, or different types of potatoes to suit your taste. Plus, it’s easy to prepare—just toss everything in a pot and let it simmer. Traditionally prepared as a vegetable broth in Malaysian cuisine, ABC soup is perfect for those who love exploring cultural dishes. Whether you’re cooking for kids or adults, ABC soup isn’t only nutritious but also simple and adaptable to various cooking methods, ensuring everyone enjoys it.

History

ABC soup’s rich history adds to its charm and popularity. Its roots trace back to Ukrainian borscht, which found its way to China during the October Revolution. This led to local adaptations, earning it the name “Luo Song Tang” in Shanghainese dialect.

In Malaysia, the soup has gained a significant following, though its exact origin remains uncertain. The name “ABC” reflects either its nutritional value, with vitamins A, B, and C, or its simplicity in preparation. Despite various theories, no single explanation stands out.

Throughout generations, ABC soup has become a comforting staple in many Asian households, symbolizing cultural fusion and showcasing the importance of soup-making in Asian culinary traditions. Alphabet soup has also been embraced in American culture, becoming a nostalgic dish that evokes childhood memories.

Recipe

Abc_Soup_0001.jpg

ABC Soup Recipe

ABC Soup is a nutritious and comforting dish that’s perfect for families and gatherings. The blend of vegetables, meat, and spices creates a hearty meal that can be enjoyed on its own or served alongside rice. This simple yet delicious soup isn’t only easy to prepare but also allows for a variety of ingredient options, making it versatile for different tastes and dietary preferences. The soup is named for the essential vitamins it provides, specifically vitamins A, B, and C.

To start, gather your ingredients and choose your preferred meat option, whether it be pork ribs, whole chicken, or anchovies. The base of the soup is typically made of wholesome vegetables such as potatoes, carrots, and onions, which provide a rich flavor and texture. The cooking method is flexible, allowing you to simmer on the stovetop, use a slow cooker, or even a pressure cooker for quicker results.

Ingredients

  • 2 potatoes, diced
  • 2 carrots, sliced
  • 1 onion, chopped
  • 1 whole chicken or 500g pork ribs
  • 1 cup corn (optional)
  • 2 celery stalks, chopped (optional)
  • 4 cups vegetable broth or chicken stock
  • Salt, to taste
  • White pepper, to taste
  • Chicken powder (optional)
  • MSG (optional)

Cooking Instructions

  1. Begin by preparing your ingredients. Wash and chop the potatoes, carrots, onions, and any additional vegetables you wish to include. If using a whole chicken, verify it’s cleaned and ready for cooking.

  2. In a large pot or slow cooker, combine all the chopped vegetables, meat, and broth or stock. If you’re using a stovetop, bring the mixture to a boil over medium-high heat.

  3. Once boiling, reduce the heat to low and cover the pot. Let it simmer for at least 1.5 to 5 hours if using a stovetop, or set your slow cooker to low for 6-8 hours or high for 3-4 hours.

  4. If using a pressure cooker, seal the lid and cook on high for 50 minutes, followed by a natural release for 20 minutes.

  5. During the last 30 minutes of cooking, taste the soup and adjust the seasoning with salt, white pepper, chicken powder, and MSG as desired.

  6. Once the soup is ready, remove any scum from the surface, and if using a whole chicken, shred the meat and return it to the pot. Serve hot, garnishing with fresh herbs if desired.

For the best results, remember to chop your ingredients into uniform sizes for even cooking and consider adding spices towards the end to maintain their flavors.

If you’re planning to store the soup, make certain to let it cool completely before placing it in an airtight container in the refrigerator. Reheat thoroughly before serving. Enjoy your homemade ABC Soup!

Final Thoughts

As you explore the comforting world of ABC Soup, it’s clear this dish holds a special place in many hearts and kitchens.

Its origins are intriguing, reflecting a blend of cultural influences, with ties to both Ukrainian borscht and Southeast Asian flavors. You’ll appreciate how each region adds its twist, enhancing the soup’s flavor and character.

Nutritionally, ABC Soup packs a punch with vitamins A, B, and C, along with a good balance of carbs, fats, and protein. Additionally, it is rich in lycopene and magnesium, contributing to its health benefits.

It’s versatile, allowing you to customize it with various vegetables and meats.

Whether you need comfort on a rainy day or a nourishing meal when feeling unwell, ABC Soup remains a beloved choice that celebrates culinary traditions and personal tastes.

FAQ

When it comes to cooking ABC Soup, you might’ve a few questions about its preparation and variations.

First, ABC stands for the vitamins A, B, and C found in the soup, making it nutritious. You can easily make it without meat by adding extra onions and vegetables for flavor. The soup is particularly popular in Southeast Asia, which highlights its cultural significance.

Cooking time varies: it takes about 1 hour on the stovetop, 6-8 hours in a slow cooker, or 25-45 minutes in a pressure cooker. Feel free to add ingredients like celery or mushrooms for extra taste.

Just remember, it’s not suitable for babies under 10-12 months due to tomato acidity.

Store leftovers in an airtight container for up to 3 days in the fridge for quick meals.

quick mexican rice

quick mexican rice

Quick Mexican Rice It’s a coincidence that you stumbled upon this discussion just as you’re looking for a quick, satisfying meal. Quick Mexican Rice is more than just a side dish; it’s a canvas for your culinary creativity and a staple for busy evenings. With