dutch oven sourdough bread
Dutch Oven Sourdough Bread
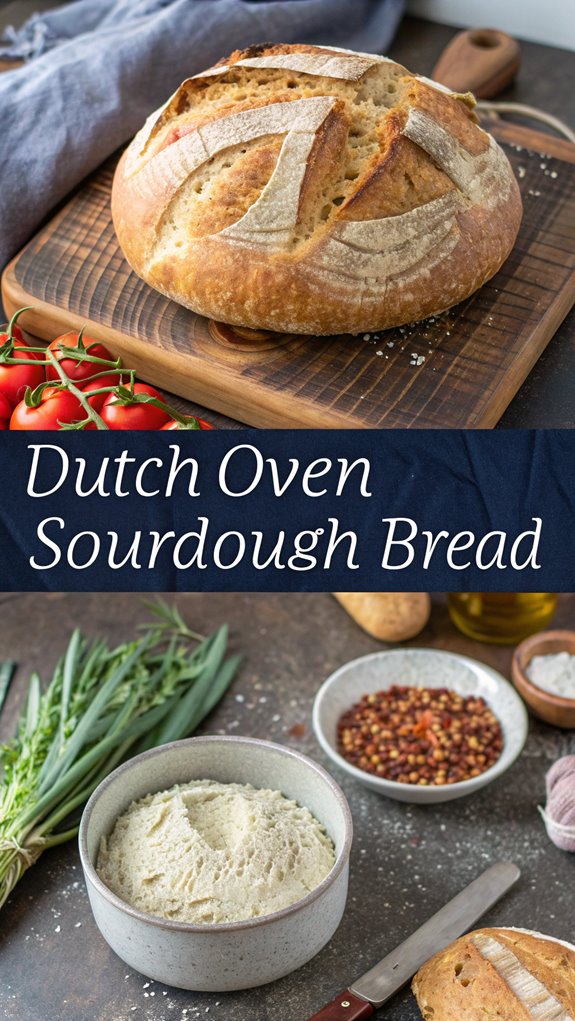
If you want to bake a delicious loaf of bread, Dutch oven sourdough is a great choice. This method uses a cast iron pot to create steam, which helps the bread rise and gives it a crispy crust. You don’t need to be an expert baker, as the process is straightforward and requires minimal kneading. Ready to learn how this traditional technique works? Let’s explore the steps to create your own perfect loaf.
Why You’ll Love This Recipe
When you try this Dutch oven sourdough bread recipe, you’ll discover how easy and rewarding it’s to bake at home.
Using a Dutch oven traps steam, which helps your bread rise beautifully and develop a crispy crust. The even heat distribution of cast iron guarantees your bread doesn’t burn, while its high-temperature tolerance allows you to bake at the ideal temperature. Additionally, the superior oven spring provided by a Dutch oven enhances the overall texture of your bread.
Plus, the tight-fitting lid creates the perfect baking environment. You’ll appreciate the light, airy crumb and robust flavor that comes from this method.
With minimal kneading required, this recipe is accessible for all skill levels. Just remember to preheat your Dutch oven and use parchment paper for easy handling, making your baking experience seamless.
History
Sourdough bread has a rich history that dates back thousands of years, making it one of the oldest forms of bread known to humanity. Its origins predate metal, as early bakers relied on naturally occurring yeast for fermentation. This unique process results in a distinct flavor and texture, establishing sourdough as a staple in many cultures. Over generations, sourdough starters have been treasured, symbolizing tradition and craftsmanship. Communities often gathered for communal baking, strengthening social bonds while sharing starters. In harsh environments, like during the Klondike gold rush, sourdough’s long shelf life proved essential for survival. Today, you can see a revival of interest in sourdough, as people embrace its artisanal roots and rich history in their homes and bakeries. Additionally, the use of a Dutch Oven in baking sourdough enhances the crust and interior texture, making it a favored method among modern bakers.
Recipe
Ingredients:
– 100 grams active sourdough starter
– 300-360 grams warm water
– 450 grams all-purpose or bread flour (or a combination)
– 10 grams salt
– Olive oil (for greasing)
– Rice flour (for dusting)
Cooking Instructions:
- Prepare the Starter: Feed your sourdough starter 4-12 hours before you begin baking. Perform a float test to verify it’s ready for use.
- Mix the Ingredients: In a large bowl, combine the warm water and flour. Mix until no dry flour remains. Then, add the sourdough starter and salt, and stir until well incorporated.
- Autolyse: Allow the dough to rest for 30 minutes. This process hydrates the flour and begins gluten development.
- Stretch and Fold: Over the next couple of hours, perform 6 rounds of stretching and folding. The first three stretches should be done every 15 minutes, while the last three can be spaced out every 30 minutes. Allow the dough to rest for 30 minutes after each stretch.
- Shape the Dough: Lightly flour your work surface and gently turn the dough out. Shape it into a round or oval loaf and place it in a banneton basket or a bowl lined with parchment paper. Cover with a damp cloth and let it rest for about 1-2 hours, or until it has visibly puffed up.
- Preheat the Dutch Oven: About 30 minutes before baking, preheat your oven to 450°F (232°C) with the Dutch oven inside.
- Score the Bread: Carefully remove the preheated Dutch oven from the oven. Turn the dough out onto a piece of parchment paper. Use a bread lame or sharp knife to score the top of the dough.
- Bake: Place the dough (with parchment) into the Dutch oven, cover with the lid, and bake for 30 minutes. After 30 minutes, remove the lid and bake for an additional 15 minutes to achieve a golden crust.
- Cool the Bread: Once baked, carefully remove the bread from the Dutch oven and let it cool on a wire rack for at least 30 minutes before slicing.
For best results, make certain to measure your ingredients accurately using a digital scale. Additionally, keep your workspace and tools clean to avoid any contamination that might affect the fermentation process. The fermentation process enhances nutrient availability in the grains, making the bread more nutritious.
Remember that sourdough baking requires practice, so don’t be discouraged if your first loaf doesn’t turn out perfectly—each attempt will teach you something new! Enjoy the process and the delightful aroma of freshly baked bread filling your kitchen.
Final Thoughts
Baking Dutch oven sourdough bread can be a rewarding experience, and it’s important to remember a few key points as you finish your baking journey.
First, always preheat your Dutch oven for at least 30 minutes to guarantee even heat distribution. This step helps create that impressive oven spring, which is enhanced by the steam trapped inside the pot.
When baking, cover your dough for 20-30 minutes to trap steam, then uncover for an additional 10-25 minutes to achieve a crispy crust.
Don’t forget to score your dough before baking; this not only enhances its appearance but also aids in even cooking.
Finally, let the bread cool on a wire rack before slicing to avoid sogginess.
Following these tips will help you enjoy a delicious, professional-quality loaf of sourdough.
FAQ
Have questions about baking Dutch oven sourdough bread? Let’s clarify a few common concerns.
First, preheat your Dutch oven to 230°C (450°F) for about an hour for even heat. Bake your bread for 45 minutes, removing the lid for the final 10-15 minutes to achieve that golden crust. If you’re facing bottom burning, consider using a baking tray underneath or lining the Dutch oven with parchment paper. Direct contact with the bottom of the dough is a common reason for burning, so taking these precautions can help.
When mixing your dough, weigh your ingredients for accuracy. Don’t forget to score the bread before baking to help it expand properly. For a longer fermentation, refrigerate your shaped dough.
Ultimately, always use heat-resistant gloves when handling your hot Dutch oven to avoid burns.
Happy baking!

Dutch Oven Sourdough Bread
Ingredients
- Ingredients:
- - 100 grams active sourdough starter
- - 300-360 grams warm water
- - 450 grams all-purpose or bread flour or a combination
- - 10 grams salt
- - Olive oil for greasing
- - Rice flour for dusting
Instructions
- Cooking Instructions:
- Prepare the Starter: Feed your sourdough starter 4-12 hours before you begin baking. Perform a float test to verify it's ready for use.
- Mix the Ingredients: In a large bowl, combine the warm water and flour. Mix until no dry flour remains. Then, add the sourdough starter and salt, and stir until well incorporated.
- Autolyse: Allow the dough to rest for 30 minutes. This process hydrates the flour and begins gluten development.
- Stretch and Fold: Over the next couple of hours, perform 6 rounds of stretching and folding. The first three stretches should be done every 15 minutes, while the last three can be spaced out every 30 minutes. Allow the dough to rest for 30 minutes after each stretch.
- Shape the Dough: Lightly flour your work surface and gently turn the dough out. Shape it into a round or oval loaf and place it in a banneton basket or a bowl lined with parchment paper. Cover with a damp cloth and let it rest for about 1-2 hours, or until it has visibly puffed up.
- Preheat the Dutch Oven: About 30 minutes before baking, preheat your oven to 450°F (232°C) with the Dutch oven inside.
- Score the Bread: Carefully remove the preheated Dutch oven from the oven. Turn the dough out onto a piece of parchment paper. Use a bread lame or sharp knife to score the top of the dough.
- Bake: Place the dough (with parchment) into the Dutch oven, cover with the lid, and bake for 30 minutes. After 30 minutes, remove the lid and bake for an additional 15 minutes to achieve a golden crust.
- Cool the Bread: Once baked, carefully remove the bread from the Dutch oven and let it cool on a wire rack for at least 30 minutes before slicing.
- For best results, make certain to measure your ingredients accurately using a digital scale. Additionally, keep your workspace and tools clean to avoid any contamination that might affect the fermentation process. The fermentation process enhances nutrient availability in the grains, making the bread more nutritious.
- Remember that sourdough baking requires practice, so don't be discouraged if your first loaf doesn't turn out perfectly—each attempt will teach you something new! Enjoy the process and the delightful aroma of freshly baked bread filling your kitchen.