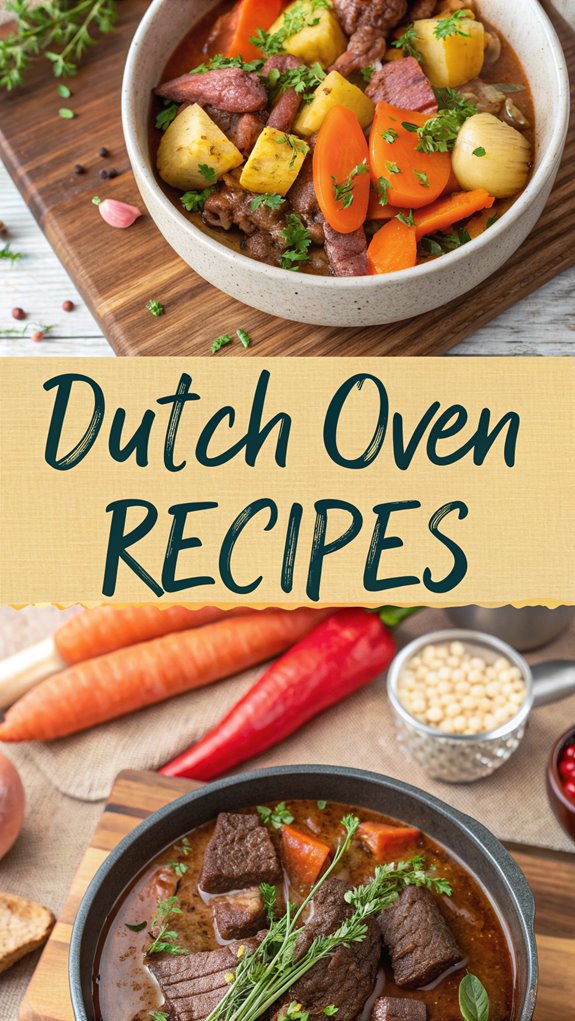
dutch oven recipes
Dutch Oven Recipes
Dutch oven recipes are the secret to cooking like a gourmet chef with barely any effort. These versatile pots can transform simple ingredients into mouthwatering meals that simmer to perfection. You’ll find that they excel at making everything from rich stews to crusty bread. If you’re curious about how to master these recipes and impress your family or friends, keep exploring the history and techniques behind this fantastic cooking method.
Why You’ll Love This Recipe
When you cook with a Dutch oven, you’ll quickly discover why it’s a favorite among home chefs. Its superior heat retention means your meals stay hot longer, allowing flavors to meld beautifully. You can use it on the stovetop, in the oven, or even over a campfire, making it incredibly versatile. The even heat distribution prevents hot spots, ensuring your food cooks consistently. Plus, it’s perfect for one-pot meals, reducing cleanup time. Whether you’re braising, baking, or frying, a Dutch oven handles it all with ease. Its durability means it’ll last for years, while also being energy efficient, saving you both time and money. Additionally, its thicker walls provide better heat retention, enhancing your cooking experience even further. Embrace the convenience and reliability of this essential kitchen tool!
History
Cooking with a Dutch oven not only enhances your meals but also connects you to its rich history.
These versatile pots originated in the 17th century, when the Dutch crafted cast cooking vessels using sand for molds. English industrialist Abraham Darby learned this technique and patented it in 1707, calling it the “Dutch oven.”
As European settlers brought these pots to America, they adapted the designs, adding legs and flat lids for better functionality. By the 18th century, Dutch ovens became essential for cooking, valued for their durability. Modern designs feature enameled steel, which is lighter and cheaper than traditional versions.
The Lodge Company, established in 1896, continues this tradition, while modern designs, like enameled steel, reflect centuries of innovation.
Embrace this culinary legacy as you create delicious dishes.
Recipe
Ingredients:
– 2 pounds (900 g) chuck roast, cut into 1-inch cubes
– 2 tablespoons (30 ml) olive oil
– 1 medium onion, diced
– 3 cloves garlic, minced
– 4 medium carrots, sliced
– 3 medium potatoes, diced
– 2 cups (480 ml) beef broth
– 1 cup (240 ml) red wine (optional; substitute with additional broth for non-alcoholic)
– 2 tablespoons (30 g) tomato paste
– 1 teaspoon (5 g) dried thyme
– 1 teaspoon (5 g) dried rosemary
– Salt and pepper to taste
– 2 tablespoons (30 g) all-purpose flour (for thickening, optional)
Instructions:
-
Preheat the Dutch Oven*: Place your Dutch oven over medium heat on the stovetop or preheat it in the oven at 350°F (175°C). If using a *campfire, prepare your coals for cooking.
-
Sear the Beef: Add the olive oil to the hot Dutch oven. Once the oil is shimmering, add the cubed chuck roast in batches, making sure not to overcrowd the pot. Sear the meat for about 4-5 minutes on each side until browned. Remove the beef and set aside.
-
Sauté Aromatics: In the same Dutch oven, add the diced onion and minced garlic. Sauté for 3-4 minutes until the onion is translucent and fragrant. Scrape up any browned bits from the bottom of the pot for added flavor.
-
Add Vegetables and Liquids: Return the browned beef to the pot. Add the sliced carrots, diced potatoes, beef broth, red wine (if using), tomato paste, thyme, rosemary, salt, and pepper. Stir everything together to combine.
-
Simmer the Stew: Bring the stew to a gentle boil, then reduce the heat to low. Cover the Dutch oven with its lid and let it simmer for about 2-3 hours, stirring occasionally, until the beef is tender and the flavors have melded together. Always cover the Dutch oven when braising to trap steam and keep the food tender.
-
Thicken the Stew (Optional): If you prefer a thicker stew, mix the flour with a small amount of cold water to create a slurry. Stir the slurry into the stew during the last 15 minutes of cooking and let it simmer until thickened.
-
Serve: Once the stew is done, taste and adjust the seasoning if needed. Serve hot, garnished with fresh parsley if desired.
Extra Tips: For the best results, choose high-quality beef and fresh vegetables. If you’re using a campfire, remember to rotate the Dutch oven and its lid regularly to avoid hot spots.
You can also experiment with different herbs and spices to customize the flavor. Leftover stew can be stored in the refrigerator for up to three days and can also be frozen for longer storage. Enjoy your hearty beef stew!
Final Thoughts
As you explore the world of Dutch oven cooking, you’ll find it offers a unique blend of versatility and flavor enhancement that truly elevates your meals. Mastering this cooking method allows you to trap steam for tender dishes, create layered flavors by searing, and utilize flavorful liquids for rich soups and stews. You can cook on the stovetop or in the oven, giving you flexibility in your cooking techniques. Remember to manage heat effectively to achieve the best results. Additionally, proper care of your Dutch oven guarantees its longevity. Acknowledgment of original sources in recipe sharing can further enrich your cooking experience and foster a sense of community among food enthusiasts. By following these tips, you can enjoy delicious meals and make the most of your Dutch oven, whether you’re cooking indoors or outdoors. Happy cooking!
FAQ
When you’re new to Dutch oven cooking, it’s common to have questions about the best practices and techniques.
First, remember to season your Dutch oven before use; this prevents rust and keeps it clean. Oiling or lining it with parchment paper will help avoid sticking.
When using coals, aim for two-thirds red and follow the “Three Up, Three Down” rule for heat management. You can cook various dishes, from soups to casseroles, making the most of the steam-trapping lid. Dutch ovens are also versatile and can be used for frying or serving, reducing the need for multiple cooking vessels.
Always let it cool before cleaning to avoid damage.
Finally, using flavored liquids enhances your meals, while the right Dutch oven type, whether shallow or deep, guarantees your dishes cook evenly.
Happy cooking!