desserts
Desserts
When you think about desserts, what comes to mind? You might envision a comforting slice of cake or perhaps a delicate pastry, each with its own story and cultural significance. Desserts aren’t just about satisfying a sweet tooth; they represent a blend of history, tradition, and innovation that reflects the essence of a culture. As you explore the fascinating evolution of these treats, you’ll uncover surprising connections and perhaps find inspiration for your next culinary adventure. What hidden gems might you discover along the way?
Why You’ll Love This Recipe
When you take a bite of this dessert, you’ll understand why it’s a favorite among many. Its rich flavors and delightful textures create a satisfying experience that keeps you coming back for more.
This recipe balances sweetness with just the right amount of acidity, making it perfect for any occasion. You can easily customize it by adding your favorite ingredients, like nuts or fruits, to enhance the taste.
The preparation is straightforward, so even if you’re new to baking, you won’t feel overwhelmed. You’ll find that gathering the ingredients is quick, and the steps are simple to follow.
As you mix and bake, the delightful aroma fills your kitchen, making the anticipation even more enjoyable.
Once you slice into this dessert, you’ll appreciate the beautiful layers and presentation, which will impress your family and friends. It’s not just about taste; it’s also about how it looks.
Serving this dessert at gatherings will surely make you the star of the show. So, whether you’re celebrating a special event or just treating yourself, this recipe is a fantastic choice that promises to please.
You won’t regret trying it!
History
Desserts have a rich and varied history that spans cultures and centuries. From ancient civilizations to modern dining, sweets have evolved considerably. You might be surprised to learn that the first known desserts appeared in ancient Egypt, where honey was used to sweeten dishes. As trade routes expanded, sugar became more accessible, and desserts flourished.
In medieval Europe, you’d find elaborate feasts featuring sweet treats made with fruits, nuts, and spices. The introduction of chocolate from the Americas in the 16th century changed the dessert landscape forever. It quickly became a favorite among the elite, leading to more creative concoctions.
In the 19th century, the Industrial Revolution played a big role in dessert history. Advances in technology allowed for mass production of sugar and other ingredients, making sweets more available to the general public. You can see how desserts began to reflect cultural identities, with each region adding its unique twist.
Today, desserts continue to evolve, influenced by globalization and dietary preferences. Whether it’s a classic cake, a trendy pastry, or a vegan treat, the history of desserts shows how culinary practices adapt over time, ensuring there’s something for everyone to enjoy.
Recipe
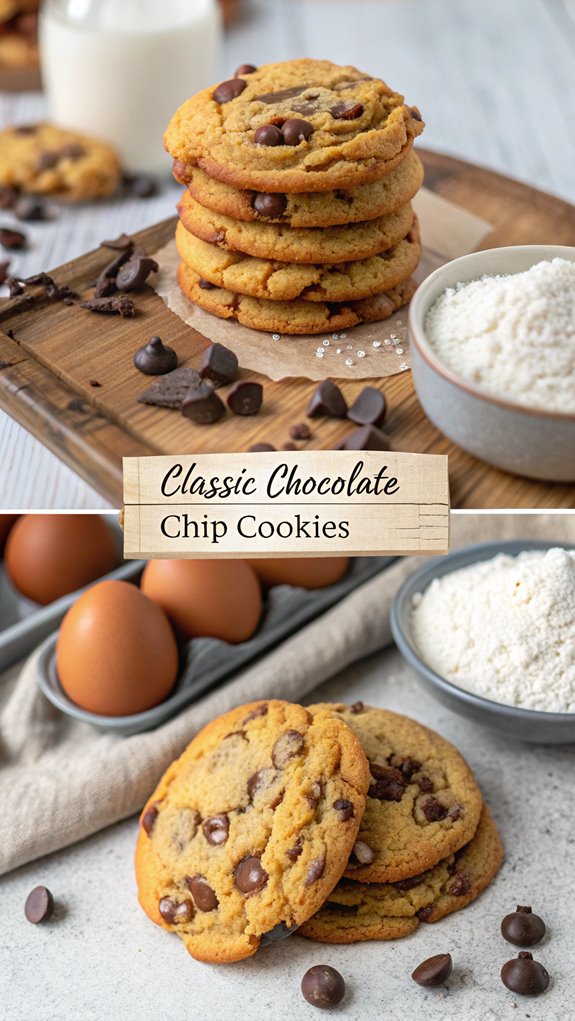
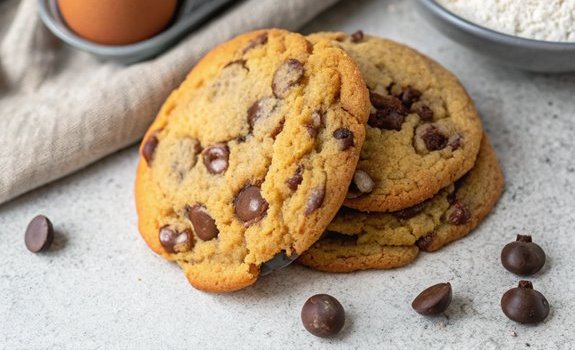
Recipe for Classic Chocolate Chip Cookies
There’s nothing quite like the smell of freshly baked chocolate chip cookies filling your kitchen. This classic dessert isn’t only a favorite among kids but also a nostalgic treat for adults.
With just a few simple ingredients, you can whip up a batch of these delicious cookies that are crispy on the outside and chewy on the inside. Perfect for sharing with friends and family, or enjoying all by yourself with a glass of milk!
To get started, make sure you have all your ingredients at room temperature for the best results. The key to achieving that perfect cookie texture lies in the balance of ingredients and careful baking.
Follow this easy recipe and you’ll have a delightful treat in no time!
Ingredients
- 2 1/4 cups all-purpose flour
- 1/2 teaspoon baking soda
- 1 cup unsalted butter, at room temperature
- 1/2 cup granulated sugar
- 1 cup packed light-brown sugar
- 1 teaspoon salt
- 2 teaspoons pure vanilla extract
- 2 large eggs
- 2 cups semisweet and/or milk chocolate chips
Cooking Instructions
- Preheat your oven to 350°F (175°C) and line a baking sheet with parchment paper.
- In a small bowl, whisk together the flour and baking soda; set aside.
- In a large bowl, using an electric mixer, beat the butter and sugars on medium speed until light and fluffy, about 2-3 minutes.
- Add the salt, vanilla extract, and eggs to the butter mixture, mixing until well combined.
- Gradually add the flour mixture to the wet ingredients, mixing until just combined. Be careful not to overmix.
- Fold in the chocolate chips using a spatula or wooden spoon until evenly distributed.
- Using a cookie scoop or tablespoon, drop rounded balls of dough onto the prepared baking sheet, spacing them about 2 inches apart.
- Bake for 10-12 minutes, or until the edges are golden brown and the centers are set.
Remove from the oven and let them cool on the baking sheet for a few minutes before transferring to a wire rack to cool completely.
For the best chocolate chip cookies, make sure to not overbake them; they should look slightly underbaked when you take them out of the oven as they’ll continue to cook while cooling.
You can also experiment by adding nuts or different types of chocolate for a unique twist. Enjoy your baking!
Final Thoughts
Baking classic chocolate chip cookies isn’t just about following a recipe; it’s about creating memories and enjoying the process. As you mix the ingredients, you’re not only combining flavors but also sharing moments with family or friends.
Whether you’re baking alone or with others, the joy of measuring, pouring, and stirring brings everyone together.
Remember, the key to great cookies lies in the details. Pay attention to the texture of the dough—too dry or too wet can change the final result.
While you’re waiting for the cookies to bake, take a moment to savor the delicious aroma filling your kitchen. It’s part of the experience.
Once the cookies are done, let them cool for a bit before diving in. Enjoying a warm cookie fresh from the oven is a simple pleasure that never gets old.
As you bite into that gooey chocolate chip, you’ll appreciate all the effort that went into making them.
FAQ
As you enjoy those freshly baked chocolate chip cookies, you might’ve some questions about the process or ingredients.
Let’s clear up a few common FAQs about desserts.
First, you may wonder how to store cookies to keep them fresh. The best method is to place them in an airtight container at room temperature. If you want to keep them longer, consider freezing them. Just make sure to wrap them well!
Another question often asked is about ingredient substitutions. If you’re out of eggs, you can use applesauce or mashed bananas in equal parts. For those with dairy allergies, almond or coconut milk can be great alternatives in many recipes.
You might also be curious about baking times. Every oven is different, so it’s a good idea to check your desserts a few minutes before the recommended time. Look for golden edges or a toothpick that comes out clean.
Lastly, remember that practice makes perfect. Don’t get discouraged if your first batch doesn’t turn out as expected. Keep experimenting with flavors and techniques, and you’ll improve over time.
Enjoy your baking journey!
Desserts
Ingredients
- Ingredients
- 2 1/4 cups all-purpose flour
- 1/2 teaspoon baking soda
- 1 cup unsalted butter at room temperature
- 1/2 cup granulated sugar
- 1 cup packed light-brown sugar
- 1 teaspoon salt
- 2 teaspoons pure vanilla extract
- 2 large eggs
- 2 cups semisweet and/or milk chocolate chips
Instructions
- Cooking Instructions
- Preheat your oven to 350°F (175°C) and line a baking sheet with parchment paper.
- In a small bowl, whisk together the flour and baking soda; set aside.
- In a large bowl, using an electric mixer, beat the butter and sugars on medium speed until light and fluffy, about 2-3 minutes.
- Add the salt, vanilla extract, and eggs to the butter mixture, mixing until well combined.
- Gradually add the flour mixture to the wet ingredients, mixing until just combined. Be careful not to overmix.
- Fold in the chocolate chips using a spatula or wooden spoon until evenly distributed.
- Using a cookie scoop or tablespoon, drop rounded balls of dough onto the prepared baking sheet, spacing them about 2 inches apart.
- Bake for 10-12 minutes, or until the edges are golden brown and the centers are set.
- Remove from the oven and let them cool on the baking sheet for a few minutes before transferring to a wire rack to cool completely.
- For the best chocolate chip cookies, make sure to not overbake them; they should look slightly underbaked when you take them out of the oven as they'll continue to cook while cooling.
- You can also experiment by adding nuts or different types of chocolate for a unique twist. Enjoy your baking!