christmas cookies
Christmas Cookies
When you bake gingerbread cookies shaped like stars or trees, you’re not just making treats; you’re participating in a time-honored tradition. These cookies can be fun to decorate and share, creating a sense of community and joy. Each cookie has a story, often tied to family recipes or cultural customs. Understanding the history behind these delightful sweets can enhance your appreciation. So, what makes Christmas cookies so special, and how can you make your own?
Why You’ll Love This Recipe
When you immerse yourself in this Christmas cookie recipe, you’ll discover a delightful mix of flavors and textures that make baking a joy.
You’ll love how the cookies blend crunchy, chewy, and crumbly textures, creating an enjoyable experience. By incorporating healthier ingredients like nuts and seasonal fruits, you’ll not only enhance the taste but also boost the nutritional value. For instance, using oats adds fiber, while dark chocolate offers antioxidants. Additionally, incorporating dried cherries provides potassium and vitamins, making your treats even more nutritious. Plus, you can opt for gluten-free flours to cater to dietary needs.
As you prepare your cookie platter, choosing a variety of cookies guarantees everyone finds something they enjoy. Remember to keep strong-flavored cookies separate to preserve their unique tastes, making your holiday baking both delicious and thoughtful.
History
Baking Christmas cookies isn’t just a modern tradition; it has a rich history that dates back to Medieval Europe. During this time, the introduction of spices through trade routes transformed simple baked goods into special treats. Ingredients like almonds and dried fruits became common, enhancing flavors in festive recipes. German monks created lebkuchen, while Swedish bakers made pepparkakor, both of which are now traditional Christmas cookies. By the 13th century, gingerbread emerged as a holiday favorite, particularly in Germany. The late 17th century brought tin cookie cutters, allowing bakers to create beautiful shapes. Cookie cutters became widely available in the U.S. between 1871 and 1906, further popularizing the crafting of festive cookies. As immigrants arrived in America, they brought their cookie recipes, blending them with local customs, which shaped the diverse cookie traditions we enjoy today.
Recipe
Ingredients:
– 3 cups all-purpose flour
– 1 cup butter, softened
– 1 cup granulated sugar
– 1 egg or 2 egg yolks
– 1 to 2 teaspoons vanilla extract
– 1/2 teaspoon almond extract (optional)
– 1/2 cup cornstarch (optional)
– 1 to 3/4 teaspoon baking powder (optional)
– 1/2 teaspoon salt (optional)
– 1/3 cup milk (optional)
Instructions:
1. In a large mixing bowl, cream together the softened butter and granulated sugar until the mixture is light and fluffy. This usually takes about 3-5 minutes. Add in the egg or egg yolks and vanilla extract, mixing well to combine.
- Gradually add the all-purpose flour to the wet ingredients, mixing until just combined. If using, incorporate almond extract, cornstarch, baking powder, and salt at this stage. The dough should be soft but not sticky.
- Divide the dough into two equal portions and wrap each in plastic wrap. Chill in the refrigerator for at least 2 hours or up to 2 days. This step helps the cookies maintain their shapes while baking.
- Preheat your oven to 350 degrees Fahrenheit. Line baking sheets with parchment paper. Once the dough is chilled, roll it out on a lightly floured surface or between two sheets of parchment paper to about 1/8-inch thickness.
- Use Christmas cookie cutters to cut out shapes from the rolled dough and transfer them to the prepared baking sheets. Bake in the preheated oven for 8 to 10 minutes, or until the edges are lightly browned.
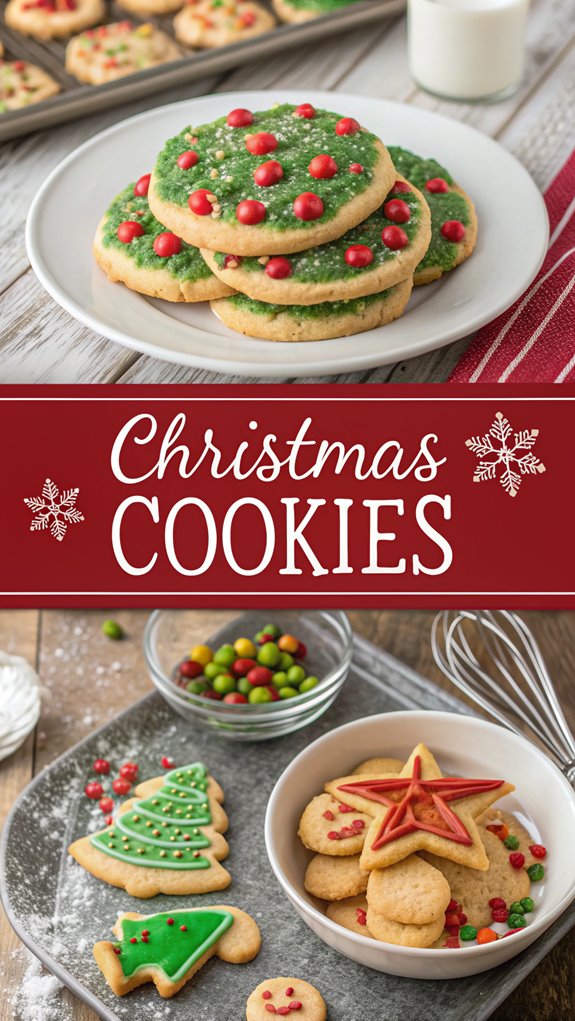
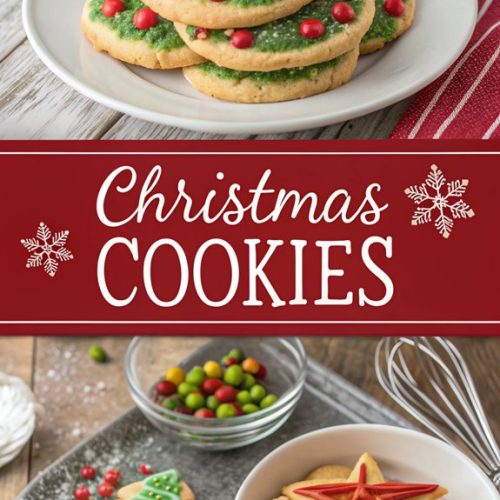
- Remove the cookies from the oven and let them cool on the baking sheets for a few minutes before transferring them to wire racks to cool completely. For those looking to elevate their cookie decorating game, consider using royal icing and food coloring to create beautiful designs. These cookies freeze beautifully, making them ideal for holiday gatherings. Remember to adjust the consistency of your icing with a little milk if needed, and don’t forget to have fun with sprinkles and edible decorations!
Enjoy the process of baking and decorating these festive cookies, and most importantly, share the joy with everyone around you.
Final Thoughts
The joy of making Christmas cookies is a wonderful way to create lasting memories with family and friends. As you gather ingredients, remember that this tradition has deep historical roots, from medieval Europe to modern-day celebrations. Baking cookies isn’t just about flavor; it’s about sharing symbols and stories. Each cookie shape can carry meaning, like stars for the Star of Bethlehem. You can also explore different cultural recipes, learning how families across the world celebrate. Gingerbread’s introduction to Europe has influenced the variety of cookies enjoyed during the holiday season.
Embrace the spirit of generosity by sharing your cookies with neighbors or leaving some for Santa, a tradition that teaches kindness. Ultimately, the time spent baking fosters connection, making your holiday season more special and memorable. Enjoy every moment!
FAQ
What do you need to know about Christmas cookies?
First, store your cookies in separate cellophane bags to prevent them from absorbing odors and moisture, which can ruin their flavors. Always use high-quality ingredients, especially butter at room temperature for the best dough consistency. Additionally, using unsalted butter enhances the flavor of your cookies. Chill your cookie dough before baking for better texture. When decorating, royal icing and sprinkles add a festive touch, while gel paste food coloring guarantees vibrant results. For presentation, mix cookie shapes like stars and trees. Remember to keep baked cookies in airtight containers to maintain freshness, and consider freezing dough for longer storage. Finally, wrap gifts in bakery boxes with ribbons for a lovely appearance.
Christmas Cookies
Ingredients
- Ingredients:
- - 3 cups all-purpose flour
- - 1 cup butter softened
- - 1 cup granulated sugar
- - 1 egg or 2 egg yolks
- - 1 to 2 teaspoons vanilla extract
- - 1/2 teaspoon almond extract optional
- - 1/2 cup cornstarch optional
- - 1 to 3/4 teaspoon baking powder optional
- - 1/2 teaspoon salt optional
- - 1/3 cup milk optional
Instructions
- Instructions:
- In a large mixing bowl, cream together the softened butter and granulated sugar until the mixture is light and fluffy. This usually takes about 3-5 minutes. Add in the egg or egg yolks and vanilla extract, mixing well to combine.
- Gradually add the all-purpose flour to the wet ingredients, mixing until just combined. If using, incorporate almond extract, cornstarch, baking powder, and salt at this stage. The dough should be soft but not sticky.
- Divide the dough into two equal portions and wrap each in plastic wrap. Chill in the refrigerator for at least 2 hours or up to 2 days. This step helps the cookies maintain their shapes while baking.
- Preheat your oven to 350 degrees Fahrenheit. Line baking sheets with parchment paper. Once the dough is chilled, roll it out on a lightly floured surface or between two sheets of parchment paper to about 1/8-inch thickness.
- Use Christmas cookie cutters to cut out shapes from the rolled dough and transfer them to the prepared baking sheets. Bake in the preheated oven for 8 to 10 minutes, or until the edges are lightly browned.
- Remove the cookies from the oven and let them cool on the baking sheets for a few minutes before transferring them to wire racks to cool completely. For those looking to elevate their cookie decorating game, consider using royal icing and food coloring to create beautiful designs. These cookies freeze beautifully, making them ideal for holiday gatherings. Remember to adjust the consistency of your icing with a little milk if needed, and don't forget to have fun with sprinkles and edible decorations!
- Enjoy the process of baking and decorating these festive cookies, and most importantly, share the joy with everyone around you.