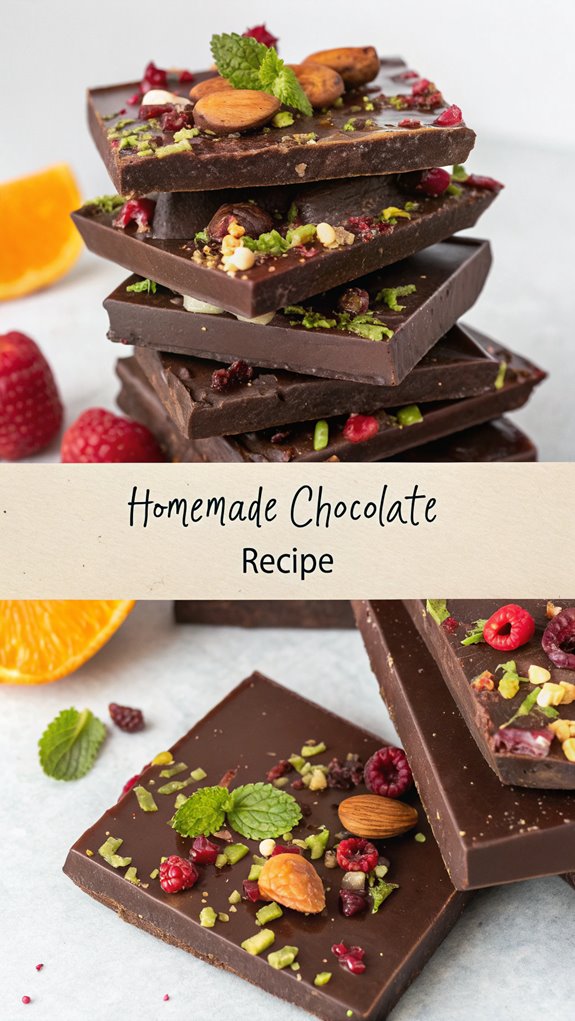
chocolate
Chocolate
Imagine enjoying a piece of dark chocolate after a long day; it not only tastes good but also has health benefits. Chocolate has a fascinating history and can be a versatile ingredient in many recipes. By understanding its origins and how to use it in your cooking, you can appreciate this treat even more. So, what makes chocolate such a beloved choice across the world? Let’s explore its background and culinary possibilities.
Why You’ll Love This Recipe
When you plunge into a chocolate recipe, you’ll discover not just a delicious treat but also a range of nutritional benefits that make it a worthwhile addition to your diet.
Dark chocolate is rich in essential minerals like iron, copper, and magnesium, which support your body’s functions. It’s high in antioxidants, even more than some fruits, helping to fight free radicals. Plus, the healthy fats in dark chocolate can lower cholesterol and boost heart health, contributing to a lower risk of cardiovascular disease. When using chocolate in recipes, choose varieties with 70% cocoa or higher for maximum benefits.
Remember to enjoy it in moderation and avoid pairing it with overly sugary ingredients. This way, you can savor the goodness of chocolate while maintaining a balanced diet.
History
Chocolate has a rich and fascinating history that stretches back thousands of years. You can trace its origins to the Mayo-Chinchipe culture in Ecuador around 3500 BCE. The Olmecs, around 1500 BC, were among the first to ferment and grind cacao beans for beverages. In Mesoamerica, the Aztecs used chocolate as medicine and in rituals. Cacao beans held economic value and were used as a form of currency in ancient Mesoamerican cultures.
Fast forward to the 16th century, when the Spanish introduced chocolate to Europe. By 1657, the first chocolate house appeared in England. The late 19th century witnessed the rise of iconic brands like Cadbury and Hershey, as innovations made chocolate more accessible. Today, chocolate continues to evolve, with artisan movements focusing on ethical production, keeping its rich history alive while embracing modern tastes.
Recipe
Ingredients:
- 1 cup cocoa powder or cacao powder
- 1/2 cup milk powder or dry milk powder
- 1/2 cup sugar (granulated or powdered)
- 1/2 cup fat source (coconut oil, butter, or cacao butter)
- Optional: Vanilla extract, nuts, or other flavorings
Instructions:
- Begin by melting your chosen fat source (coconut oil, butter, or cacao butter) in a heatproof bowl over a pot of simmering water or in the microwave. Stir occasionally until fully melted and smooth.
- In a separate bowl, sift together the cocoa powder, milk powder, and sugar. This helps to guarantee that there are no lumps and that the ingredients are well combined.
- Once the fat is melted, gradually add the sifted dry ingredients to the bowl, stirring continuously until the mixture is smooth and fully combined. If using vanilla extract, add it at this stage for extra flavor.
- If you wish to add any nuts or dried fruits, fold them into the mixture gently to avoid breaking them up too much.
- Pour the chocolate mixture into your molds, ensuring an even distribution. Tap the molds lightly on the counter to remove any air bubbles.
- Allow the chocolate to set at room temperature for about 30 minutes, or place it in the freezer for quicker setting. Once firm, carefully remove the chocolates from the molds.
- Store your homemade chocolate in an airtight container in the refrigerator to maintain freshness and prevent melting. Chocolate made with coconut oil stabilizes better after resting in the fridge overnight.
Extra Tips:
When making homemade chocolate, using high-quality cocoa powder is essential for achieving the best flavor.
Be careful not to over-mix the chocolate, as this can create a dense texture.
Allow sufficient time for the chocolate to set properly, and consider refrigerating it for a firmer bite.
For added creativity, try experimenting with different sweeteners or flavorings to make the chocolate uniquely yours!
Final Thoughts
Creating your own chocolate isn’t only a fun and rewarding experience but also allows you to customize flavors to suit your taste.
You can explore the rich history of chocolate, which dates back to 1900 BC in Mesoamerica, and appreciate how it evolved into a beloved treat worldwide. From the first chocolate house in England in 1657 to the mass production that followed the Industrial Revolution, chocolate has transformed greatly. Notably, influencer engagement has significantly boosted the visibility of chocolate-related content, showcasing the enduring love for this delicious treat.
Today, you can enjoy a variety of products, from classic bars to artisan creations. As you make your own chocolate, consider its historical significance and cultural impact.
This understanding can enhance your appreciation for each bite, connecting you to centuries of chocolate lovers around the globe.
FAQ
Have you ever wondered how chocolate goes from bean to bar?
It all starts with harvesting cacao pods, which are picked when ripe. Next, the beans undergo fermentation for 3-6 days, developing their flavor. During this fermentation process, the mucilage contributes to the initial organoleptic properties of the beans.
Once fermented, they’re dried in the sun and packed for transport. Roasting follows, where beans are heated at 120°C for 20-30 minutes to enhance their aroma.
After roasting, the outer shells are removed, leaving cocoa nibs. These nibs are ground into cocoa paste, then conched for up to 48 hours to improve texture.
Finally, the chocolate is tempered for a glossy finish and molded into bars. Each step is essential for producing high-quality chocolate that you can enjoy!
Chocolate
Ingredients
- Ingredients:
- 1 cup cocoa powder or cacao powder
- 1/2 cup milk powder or dry milk powder
- 1/2 cup sugar granulated or powdered
- 1/2 cup fat source coconut oil, butter, or cacao butter
- Optional: Vanilla extract nuts, or other flavorings
Instructions
- Instructions:
- Begin by melting your chosen fat source (coconut oil, butter, or cacao butter) in a heatproof bowl over a pot of simmering water or in the microwave. Stir occasionally until fully melted and smooth.
- In a separate bowl, sift together the cocoa powder, milk powder, and sugar. This helps to guarantee that there are no lumps and that the ingredients are well combined.
- Once the fat is melted, gradually add the sifted dry ingredients to the bowl, stirring continuously until the mixture is smooth and fully combined. If using vanilla extract, add it at this stage for extra flavor.
- If you wish to add any nuts or dried fruits, fold them into the mixture gently to avoid breaking them up too much.
- Pour the chocolate mixture into your molds, ensuring an even distribution. Tap the molds lightly on the counter to remove any air bubbles.
- Allow the chocolate to set at room temperature for about 30 minutes, or place it in the freezer for quicker setting. Once firm, carefully remove the chocolates from the molds.
- Store your homemade chocolate in an airtight container in the refrigerator to maintain freshness and prevent melting. Chocolate made with coconut oil stabilizes better after resting in the fridge overnight.