cherry sweet rolls
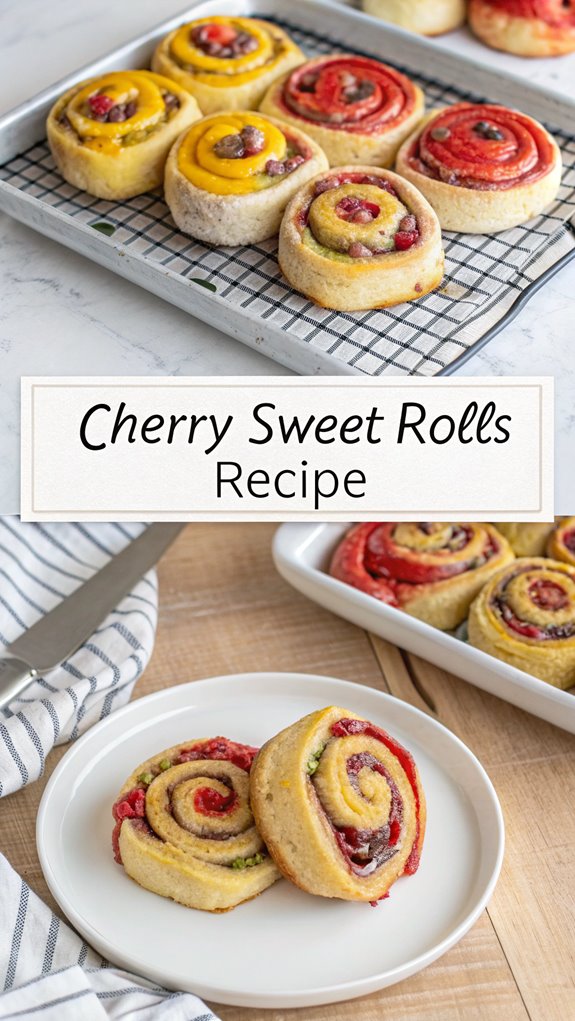
Cherry Sweet Rolls
You might think Cherry Sweet Rolls are too complex to make at home, but they’re actually quite approachable. With a few simple ingredients and steps, you can create a treat that elevates any meal. Imagine pulling a tray of warm rolls from the oven, the sweet-tart aroma enveloping your kitchen. As you consider the history behind these rolls and how they can be customized, you’ll find that their charm goes beyond just taste. What makes them so special might surprise you, especially when you explore the variations that can make them uniquely yours.
Why You’ll Love This Recipe
You’ll absolutely love this Cherry Sweet Rolls recipe for its delightful combination of flavors and textures. The sweet, soft dough pairs beautifully with the tartness of cherries, creating a perfect balance that you’ll appreciate in every bite.
As you prepare these rolls, you’ll enjoy the simple steps that make the process easy and fun. First, the dough is light and fluffy, allowing it to rise perfectly and create a wonderful base.
You’ll mix in cherry filling, which adds both sweetness and a burst of flavor. As the rolls bake, your kitchen will fill with a warm, inviting aroma, making it hard to resist tasting them right away.
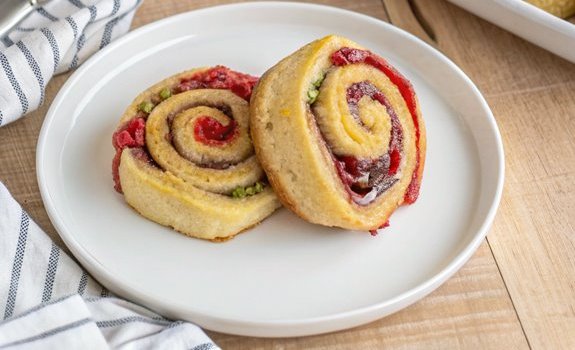
Once they’re out of the oven, you’ll love the golden-brown tops, and a drizzle of icing will make them even more appealing. These rolls can be served warm or at room temperature, making them a versatile treat for breakfast, brunch, or dessert.
Whether you’re impressing guests or enjoying a cozy day at home, these Cherry Sweet Rolls are bound to become a favorite. With this recipe, you’ll be creating delicious memories in your kitchen.
History
The history of sweet rolls, including cherry varieties, dates back centuries and reflects a rich tapestry of culinary traditions. You’ll find that these delightful treats have roots in various cultures around the world.
In Europe, sweet rolls emerged during the Middle Ages, often made with enriched dough, butter, and sugar. Ingredients varied by region, which led to unique versions of sweet rolls.
As baking techniques improved, cherry sweet rolls became popular, especially in Eastern European cuisines. Here, sour cherries were often used, giving a tangy flavor that balanced the sweetness of the dough.
In America, settlers adapted these recipes using local ingredients, leading to the cherry sweet rolls we enjoy today.
Over time, the popularity of cherry sweet rolls spread, becoming a favorite in bakeries and homes alike. They’re often associated with special occasions, like holidays and family gatherings.
You might even find regional variations, with different spices and toppings added. This shows how adaptable and beloved these rolls have become.
Recipe
Cherry Sweet Rolls
Cherry Sweet Rolls are a delightful treat that combines the sweetness of cherries with soft, fluffy dough. Perfect for breakfast, brunch, or a sweet snack, these rolls are sure to impress family and friends. The best part is that they’re relatively easy to make, and the aroma of freshly baked rolls will fill your kitchen, making it a warm and inviting space.
To create these delicious Cherry Sweet Rolls, you’ll need a few simple ingredients. The dough is enriched with butter and milk, making it soft and tender. The star of the show is the cherry filling, which can be made using fresh or canned cherries. Once baked to golden perfection, these rolls can be drizzled with a sweet glaze, adding an extra layer of flavor that complements the cherries beautifully.
Ingredients:
– 2 ½ cups all-purpose flour
– ¼ cup granulated sugar
– 1 packet (2 ¼ teaspoons) active dry yeast
– ½ teaspoon salt
– ½ cup whole milk
– ¼ cup unsalted butter, softened
– 1 large egg
– 1 cup cherries (fresh or canned, pitted and chopped)
– 1 tablespoon cornstarch (if using fresh cherries)
– 1 teaspoon vanilla extract
– 1 tablespoon lemon juice
– 1 cup powdered sugar (for glaze)
– 2 tablespoons milk (for glaze)
Cooking Instructions:
- In a small saucepan, heat the milk and butter together over low heat until the butter is melted. Let it cool slightly before adding to a large mixing bowl.
- In the mixing bowl with the milk and butter, add the granulated sugar, active dry yeast, and salt. Stir to combine, then let it sit for about 5 minutes until frothy.
- Add the egg to the mixture and gradually mix in the flour, one cup at a time, until a soft dough forms. Knead the dough on a floured surface for about 5-7 minutes, until it’s smooth and elastic.
- Place the dough in a greased bowl, cover with a clean towel, and let it rise in a warm place for about 1 hour or until doubled in size.
- While the dough is rising, prepare the cherry filling by combining cherries, cornstarch (if using fresh), vanilla extract, and lemon juice in a bowl. Set aside.
- Once the dough has risen, roll it out on a floured surface into a rectangle about ¼ inch thick. Spread the cherry filling evenly over the surface of the dough.
- Starting from one end, carefully roll the dough tightly into a log. Slice the log into 12 equal pieces and place them in a greased baking dish.
- Cover the rolls with a towel and let them rise for another 30 minutes. Preheat the oven to 350°F (175°C) during this time.
- Bake the rolls in the preheated oven for 25-30 minutes or until they’re golden brown.
- While the rolls are baking, prepare the glaze by mixing powdered sugar and milk in a small bowl until smooth. Drizzle the glaze over the warm rolls once they’re out of the oven.
For the best results, make sure your yeast is fresh and active for a good rise. If using fresh cherries, allow them to drain well to avoid excess moisture in the filling. You can also experiment with different fillings such as cream cheese or other fruits for a unique twist. Enjoy your Cherry Sweet Rolls warm, fresh from the oven!
Final Thoughts
Baking your own Cherry Sweet Rolls can be a rewarding experience that fills your kitchen with delightful aromas and creates a sense of warmth.
As you gather your ingredients and follow the recipe, you’ll find that each step brings you closer to a delicious treat. The process of kneading the dough and rolling it out can be quite satisfying, allowing you to connect with the art of baking.
Once you’ve rolled and filled your sweet rolls, the anticipation builds as they rise and bake.
When you finally pull them out of the oven, the golden-brown color and gooey cherry filling will make all your efforts worthwhile.
Sharing these rolls with family or friends can turn a simple breakfast or snack into a special occasion.
FAQ
As you commence your Cherry Sweet Roll journey, you might’ve some questions about the process or ingredients. Here are some common FAQs to help you along the way.
What type of cherries should I use? Fresh, pitted cherries work best for a vibrant flavor, but you can also use canned cherries in syrup if fresh ones aren’t available. Just remember to drain them well.
How long does the dough need to rise? Typically, the dough should rise for about an hour, or until it has doubled in size. A warm, draft-free area is ideal for this process.
Can I make the rolls ahead of time? Absolutely! You can prepare the rolls up to the second rise, cover them tightly, and refrigerate overnight. Just allow them to come to room temperature before baking.
What if my rolls aren’t fluffy? If your rolls turn out dense, it might be due to expired yeast or overworking the dough. Always check the expiration date on your yeast and knead just until smooth.
Hopefully, these answers clear up any confusion. Enjoy baking your Cherry Sweet Rolls, and don’t hesitate to experiment with flavors!
Ingredients
- Ingredients:
- - 2 ½ cups all-purpose flour
- - ¼ cup granulated sugar
- - 1 packet 2 ¼ teaspoons active dry yeast
- - ½ teaspoon salt
- - ½ cup whole milk
- - ¼ cup unsalted butter softened
- - 1 large egg
- - 1 cup cherries fresh or canned, pitted and chopped
- - 1 tablespoon cornstarch if using fresh cherries
- - 1 teaspoon vanilla extract
- - 1 tablespoon lemon juice
- - 1 cup powdered sugar for glaze
- - 2 tablespoons milk for glaze
Instructions
- Cooking Instructions:
- In a small saucepan, heat the milk and butter together over low heat until the butter is melted. Let it cool slightly before adding to a large mixing bowl.
- In the mixing bowl with the milk and butter, add the granulated sugar, active dry yeast, and salt. Stir to combine, then let it sit for about 5 minutes until frothy.
- Add the egg to the mixture and gradually mix in the flour, one cup at a time, until a soft dough forms. Knead the dough on a floured surface for about 5-7 minutes, until it's smooth and elastic.
- Place the dough in a greased bowl, cover with a clean towel, and let it rise in a warm place for about 1 hour or until doubled in size.
- While the dough is rising, prepare the cherry filling by combining cherries, cornstarch (if using fresh), vanilla extract, and lemon juice in a bowl. Set aside.
- Once the dough has risen, roll it out on a floured surface into a rectangle about ¼ inch thick. Spread the cherry filling evenly over the surface of the dough.
- Starting from one end, carefully roll the dough tightly into a log. Slice the log into 12 equal pieces and place them in a greased baking dish.
- Cover the rolls with a towel and let them rise for another 30 minutes. Preheat the oven to 350°F (175°C) during this time.
- Bake the rolls in the preheated oven for 25-30 minutes or until they're golden brown.
- While the rolls are baking, prepare the glaze by mixing powdered sugar and milk in a small bowl until smooth. Drizzle the glaze over the warm rolls once they're out of the oven.
- For the best results, make sure your yeast is fresh and active for a good rise. If using fresh cherries, allow them to drain well to avoid excess moisture in the filling. You can also experiment with different fillings such as cream cheese or other fruits for a unique twist. Enjoy your Cherry Sweet Rolls warm, fresh from the oven!