brownie cookies
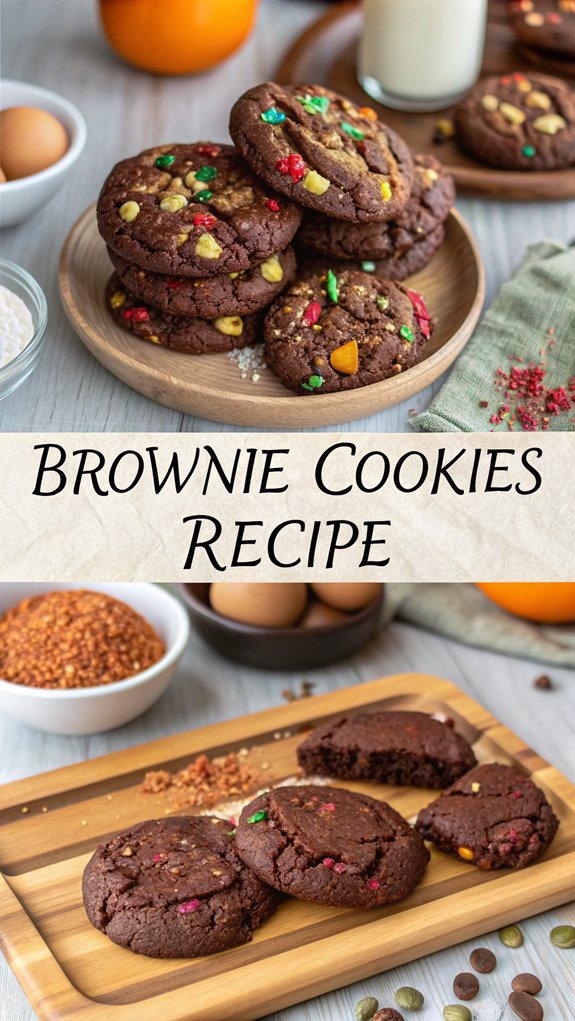
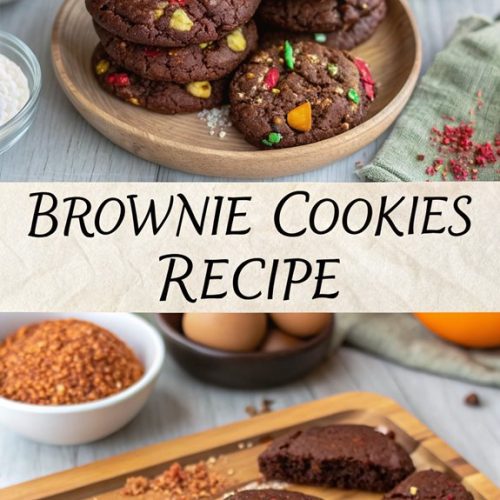
Brownie Cookies
If you’re looking for a quick and delicious treat, brownie cookies might be just what you need. These cookies combine the rich, fudgy taste of traditional brownies with the ease of cookie preparation. Plus, you can easily modify the recipe to fit different diets or preferences, making them a versatile option. Curious about how to make these delightful cookies and their interesting history? Let’s explore further.
Why You’ll Love This Recipe
When you try this brownie cookie recipe, you’ll quickly see why it’s a favorite among bakers of all levels.
You’ll love how easy it’s to whip up in under 20 minutes. This recipe uses less sugar by combining ripe bananas with natural sweeteners, making it a healthier choice. Natural sweetness from ripe bananas enhances flavor, ensuring that every bite is delicious.
You’ll also find that it’s versatile; you can swap in different nut butters or flours, like oat flour, for a unique twist. Plus, adding cocoa powder and chocolate chips gives these cookies a rich flavor.
With options for customization, you can cater to your taste preferences. And don’t worry—these cookies are toddler-friendly, thanks to their wholesome ingredients and simple instructions.
Enjoy baking!
History
Understanding the history of brownie cookies adds depth to your baking experience.
The first brownie was created in 1893 at the Palmer House pastry kitchen in Chicago for the Columbian Exposition. Early recipes varied, with Fannie Farmer mentioning a molasses-based brownie in 1896. By 1901, chocolate brownies appeared in advertisements at Donaldson’s Department Store. The Palmer House Hotel, where the first chocolate brownies were created, played a significant role in establishing this beloved dessert’s legacy.
Cooking schools promoted brownies in the early 20th century, leading to recipes with chocolate by 1906. Bertha Palmer’s request for a portable dessert sparked this popular treat’s creation.
Over time, brownies evolved from simple recipes to a balance of fudgy and cakey textures. The mid-20th century saw the rise of brownie mixes, making these delicious treats even more accessible for home bakers like you.
Recipe
Ingredients:
– 113g butter
– 85g dark chocolate (60-70% cacao)
– 100g brown sugar
– 100g granulated sugar
– ⅔ cup all-purpose flour
– ¼ cup unsweetened cocoa powder
– 1 teaspoon vanilla extract
– ¼ teaspoon salt
– Optional: chopped nuts (e.g., pecans) or crushed peppermint
Cooking Instructions:
- Preheat your oven to 350°F (175°C) and line a baking sheet with parchment paper.
- In a microwave-safe bowl, melt the butter and dark chocolate together, stirring every 30 seconds until smooth. Allow it to cool slightly.
- In a separate bowl, beat the brown sugar, granulated sugar, and eggs together until the mixture is light and frothy.
- Gradually add the melted chocolate mixture to the egg and sugar mixture, mixing well until combined.
- In another bowl, whisk together the flour, cocoa powder, and salt. Gradually add this dry mixture to the wet ingredients, stirring until just combined. If desired, fold in chopped nuts or crushed peppermint.
- Chill the dough in the refrigerator for 30 minutes to an hour to help with shaping. Chilling the dough can improve the overall texture and flavor.
- Using a cookie scoop or spoon, portion out 2-tablespoon-sized balls of dough and place them on the prepared baking sheet, spaced about 2-3 inches apart.
- Bake in the preheated oven for 8-10 minutes, or until the edges are set and the centers are still slightly underdone.
- Allow the cookies to cool on the baking sheet for a few minutes before transferring them to a wire rack to cool completely.
For the best results, use a kitchen scale to measure your ingredients accurately, as this can greatly improve the consistency of your cookies.
Keep an eye on the cookies while baking, as oven temperatures can vary.
Remember that removing the cookies when they’re still soft in the center will help maintain their fudgy texture.
Enjoy experimenting with mix-ins like nuts or festive crushed peppermint for a personalized touch!
Final Thoughts
As you wrap up your brownie cookie adventure, it’s essential to appreciate the delightful blend of flavors and textures you’ve created.
These cookies combine the rich, fudgy taste of brownies with the portability of cookies, making them a perfect treat. Remember, using quality ingredients can greatly enhance the final product. Additionally, consider that the Palmer House Brownie is a historical dessert linked to the origins of brownies, inspiring many modern adaptations. Pay attention to the balance between fat and sugar to achieve that glossy skin and ideal texture. Whether you prefer them cakey or fudgy, experimenting with baking times and ingredient ratios can yield delicious results.
Finally, don’t forget to share your creations! Brownie cookies aren’t just a treat for you; they’re also a wonderful gift for friends and family.
Enjoy your baking journey and the smiles it brings!
FAQ
After enjoying your brownie cookie experience, you might’ve a few questions about this delicious treat.
First, the texture should be gooey and chocolatey inside, with a crinkly crust outside. If your batter feels thick, don’t overmix it; just chill it in the refrigerator for better consistency. Baking these cookies is made even easier because the recipe is rigorously tested by pastry chef Rachel Riegel, ensuring perfect results every time.
To avoid overbaking, keep an eye on the cookies and take them out when the edges are set. For a crinkle top, whip the eggs and sugar well.
Use high-quality chocolate and unsweetened cocoa powder for rich flavor. You can customize your cookies by adding peanut butter chips or nuts.
Finally, store them in an airtight container to keep them fresh and delicious for longer!
Brownie Cookies
Ingredients
- Ingredients:
- - 113g butter
- - 85g dark chocolate 60-70% cacao
- - 100g brown sugar
- - 100g granulated sugar
- - ⅔ cup all-purpose flour
- - ¼ cup unsweetened cocoa powder
- - 1 teaspoon vanilla extract
- - ¼ teaspoon salt
- - Optional: chopped nuts e.g., pecans or crushed peppermint
Instructions
- Cooking Instructions:
- Preheat your oven to 350°F (175°C) and line a baking sheet with parchment paper.
- In a microwave-safe bowl, melt the butter and dark chocolate together, stirring every 30 seconds until smooth. Allow it to cool slightly.
- In a separate bowl, beat the brown sugar, granulated sugar, and eggs together until the mixture is light and frothy.
- Gradually add the melted chocolate mixture to the egg and sugar mixture, mixing well until combined.
- In another bowl, whisk together the flour, cocoa powder, and salt. Gradually add this dry mixture to the wet ingredients, stirring until just combined. If desired, fold in chopped nuts or crushed peppermint.
- Chill the dough in the refrigerator for 30 minutes to an hour to help with shaping. Chilling the dough can improve the overall texture and flavor.
- Using a cookie scoop or spoon, portion out 2-tablespoon-sized balls of dough and place them on the prepared baking sheet, spaced about 2-3 inches apart.
- Bake in the preheated oven for 8-10 minutes, or until the edges are set and the centers are still slightly underdone.
- Allow the cookies to cool on the baking sheet for a few minutes before transferring them to a wire rack to cool completely.
- For the best results, use a kitchen scale to measure your ingredients accurately, as this can greatly improve the consistency of your cookies.
- Keep an eye on the cookies while baking, as oven temperatures can vary.
- Remember that removing the cookies when they're still soft in the center will help maintain their fudgy texture.
- Enjoy experimenting with mix-ins like nuts or festive crushed peppermint for a personalized touch!