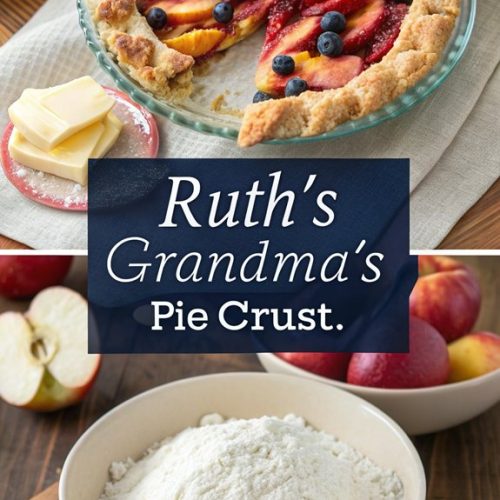
ruths grandmas pie crust
Ruths Grandmas Pie Crust
You might think making pie crust is too complicated, but Ruth’s Grandma’s recipe is straightforward and reliable. With a few simple ingredients and some careful steps, you can create a flaky crust that impresses everyone. This recipe has been passed down through generations, connecting family and tradition. Curious about the history and how to make it? Let’s explore what makes this crust special and why it’s a must-try for any baker.
Why You’ll Love This Recipe
When you try Ruth’s Grandma’s Pie Crust, you’ll quickly discover why it stands out as a favorite among bakers. The flaky texture is achieved by using cold butter or fat, making each bite delightful. You’ll find it easy to roll out, thanks to the cold ingredients and perfect flour balance. This recipe offers a foolproof result, with vinegar and egg enhancing both flakiness and stability. Plus, it’s versatile; whether you choose butter, lard, or coconut oil, it works for both desserts and savory pies. Remember to keep your ingredients cold and avoid overmixing to achieve that tender crust. Using cold fat is essential for achieving flakiness, allowing solid fat pieces to melt during baking and create the desired texture. With these tips, you’ll create a delicious pie that impresses everyone!
History
Pie crust has a rich history that stretches back centuries, evolving from simple beginnings to the beloved staple we recognize today.
Pie making dates back to times when baking involved basic techniques and ingredients. Early American bakers, often grandmothers, perfected their crusts using lard for flakiness, along with flour, water, and salt. Over time, the shift to vegetable shortening and butter occurred, reflecting changing tastes and ingredient availability. Techniques like chilling the dough became essential for maintaining texture. Minimal handling helps preserve those flaky layers, while modern twists, such as adding eggs or vinegar, enhance the crust’s quality. Homemade meals prepared with love and care are a testament to the enduring legacy of these traditional recipes. Family recipes passed down through generations keep these traditions alive, making pie a cherished part of gatherings, especially during Thanksgiving.
Recipe
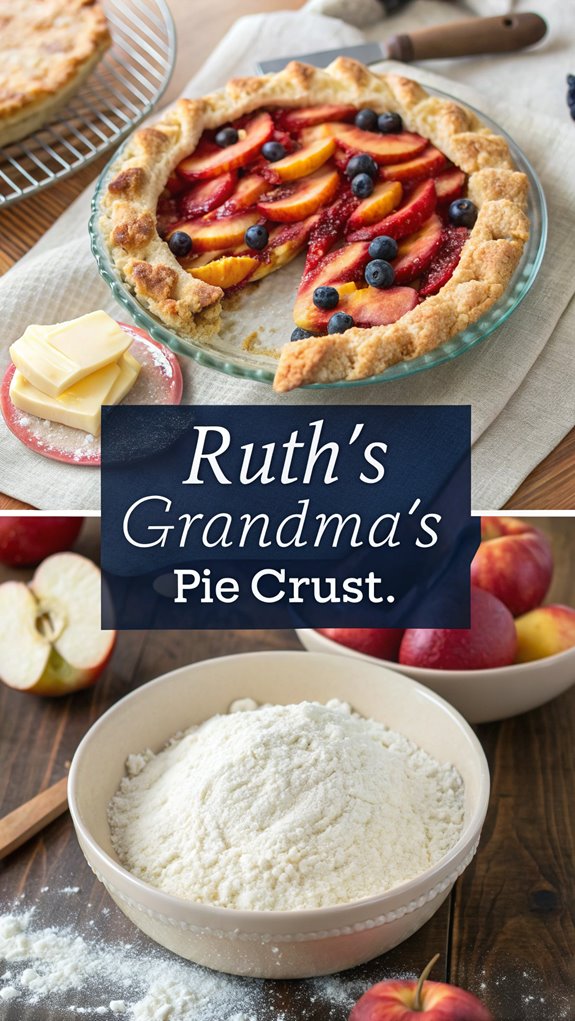
Ruth’s Grandma’s Pie Crust is a classic recipe that has been passed down through generations, embodying the warmth and comfort of homemade baking. This flaky and delicious crust serves as a perfect foundation for all types of pies, whether savory or sweet. The combination of flour, shortening, and a touch of sugar creates a tender texture that melts in your mouth, making every bite a delightful experience. Ruth’s Grandma’s Pie Crust features a simple blend of ingredients that results in a delightful crust.
Making this pie crust isn’t only simple but also a gratifying process that allows you to connect with the art of baking. Once you master this recipe, you’ll find yourself experimenting with various fillings and flavors, bringing a piece of Ruth’s family tradition into your own kitchen.
Let’s explore the ingredients and steps needed to create this delightful pie crust.
Ingredients
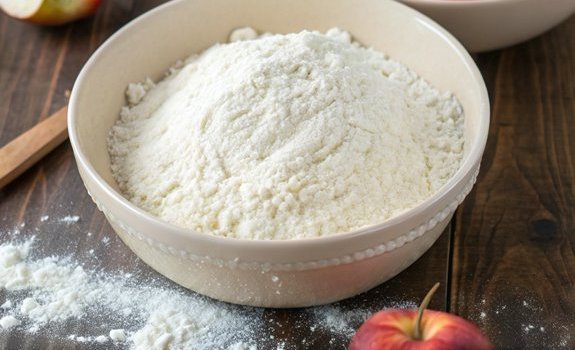
– 4 cups all-purpose flour
– 1 ¾ cups shortening
– 3 tablespoons white sugar
– 2 teaspoons salt
– 1 egg
– Water (as needed)
Instructions
1. In a large mixing bowl, combine all-purpose flour, shortening, sugar, and salt. Using a pastry cutter, blend the ingredients together until the mixture resembles coarse crumbs.
- In a separate bowl, mix the egg with a small amount of water. Gradually blend this mixture into the flour mixture until the dough comes together but isn’t sticky.
- Chill the dough in the refrigerator until you’re ready to use it. This will help firm up the crust and make it easier to roll out.
- On a floured surface, roll out the chilled dough to your desired thickness. Carefully place the rolled-out dough into a pie dish, trimming any excess from the edges.
- Preheat your oven to 425°F. If you plan to blind bake the crust, poke holes in the bottom with a fork to prevent bubbling.
When preparing Ruth’s Grandma’s Pie Crust, remember to handle the dough gently to avoid overmixing, as this can lead to a tough crust.
Always keep your ingredients cold, especially the shortening or butter, to maintain a flaky texture. Feel free to add spices or herbs to complement your pie filling for an extra layer of flavor.
And for a rustic presentation, use fork tines to press into the edges instead of crimping, giving your pie a charming homemade look. Happy baking!
Final Thoughts
As you wrap up your baking journey with Grandma’s pie crust, it’s important to remember the key elements that contribute to its success. This versatile crust works well for both sweet and savory fillings, plus you can customize flavors by adding spices or herbs. It’s easy to make, and you can prepare it ahead of time, storing it in the fridge or freezer. Remember to chill your ingredients to keep the crust flaky and avoid overworking the dough. For the best results, let your rolled crust rest and blind bake it if needed. Additionally, the flaky texture achieved through a combination of butter and shortening is essential for a perfect pie crust. With these tips in mind, you’ll create a delicious pie crust that honors Grandma’s cherished recipe while impressing your family and friends.
Happy baking!
FAQ
Wondering what questions you might’ve about making Grandma’s pie crust? This recipe yields four crusts, perfect for both sweet and savory pies.
It only takes about 10-15 minutes to prepare, but remember to chill the dough for at least 30 minutes. You can store any extra dough in the fridge for two days or freeze it for up to three months.
Don’t worry if you’re a beginner; the steps are straightforward. Sugar adds moisture and balances the crust’s flavor. You can use shortening, butter, or lard for different textures. Fat temperature is crucial for achieving a flaky texture, so ensure your fat is cold before mixing.
Make sure you handle the dough minimally to keep it flaky, and avoid overmixing. With these tips, you’ll be ready to impress with your pie-making skills!
Ruths Grandmas Pie Crust
Ingredients
- Ingredients
- - 4 cups all-purpose flour
- - 1 ¾ cups shortening
- - 3 tablespoons white sugar
- - 2 teaspoons salt
- - 1 egg
- - Water as needed
Instructions
- Instructions
- In a large mixing bowl, combine all-purpose flour, shortening, sugar, and salt. Using a pastry cutter, blend the ingredients together until the mixture resembles coarse crumbs.
- In a separate bowl, mix the egg with a small amount of water. Gradually blend this mixture into the flour mixture until the dough comes together but isn't sticky.
- Chill the dough in the refrigerator until you're ready to use it. This will help firm up the crust and make it easier to roll out.
- On a floured surface, roll out the chilled dough to your desired thickness. Carefully place the rolled-out dough into a pie dish, trimming any excess from the edges.
- Preheat your oven to 425°F. If you plan to blind bake the crust, poke holes in the bottom with a fork to prevent bubbling.
- When preparing Ruth's Grandma's Pie Crust, remember to handle the dough gently to avoid overmixing, as this can lead to a tough crust.
- Always keep your ingredients cold, especially the shortening or butter, to maintain a flaky texture. Feel free to add spices or herbs to complement your pie filling for an extra layer of flavor.
- And for a rustic presentation, use fork tines to press into the edges instead of crimping, giving your pie a charming homemade look. Happy baking!